How to create security groups
Security groups restrict the functions and sections of the Rezgo admin that your system users can access. Note that restricted functions and sections are still visible, but they are not accessible.
To create a security group, navigate to Settings in the main menu and click Security Groups.
1. Click Create Security Group.

2. Name your new security group (1). The name must not already be in use.
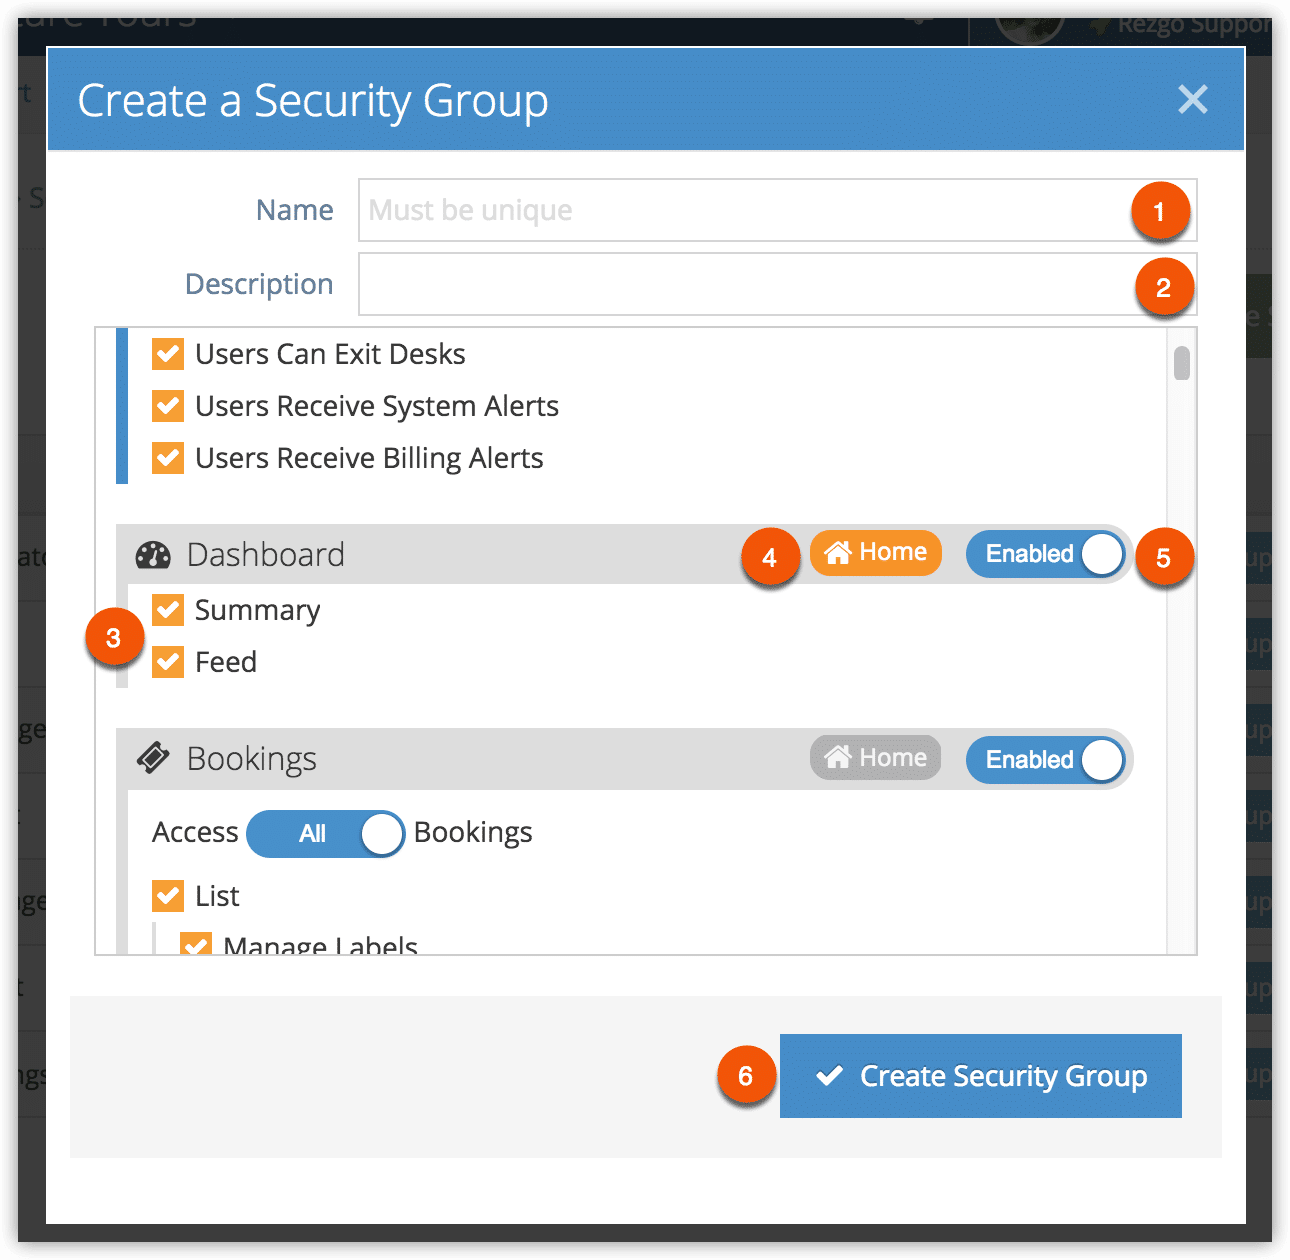
3. Add an optional description (2).
4. Uncheck any functions that users in this security group shouldn’t be able to access (3). If you want to give users access to settings, you will first need to enable the Settings section.
5. Click Home on any section. This will be the section that users in this security group are taken to when they log in (4).
6. Disable any sections that users in this security group shouldn’t be able to access (5).
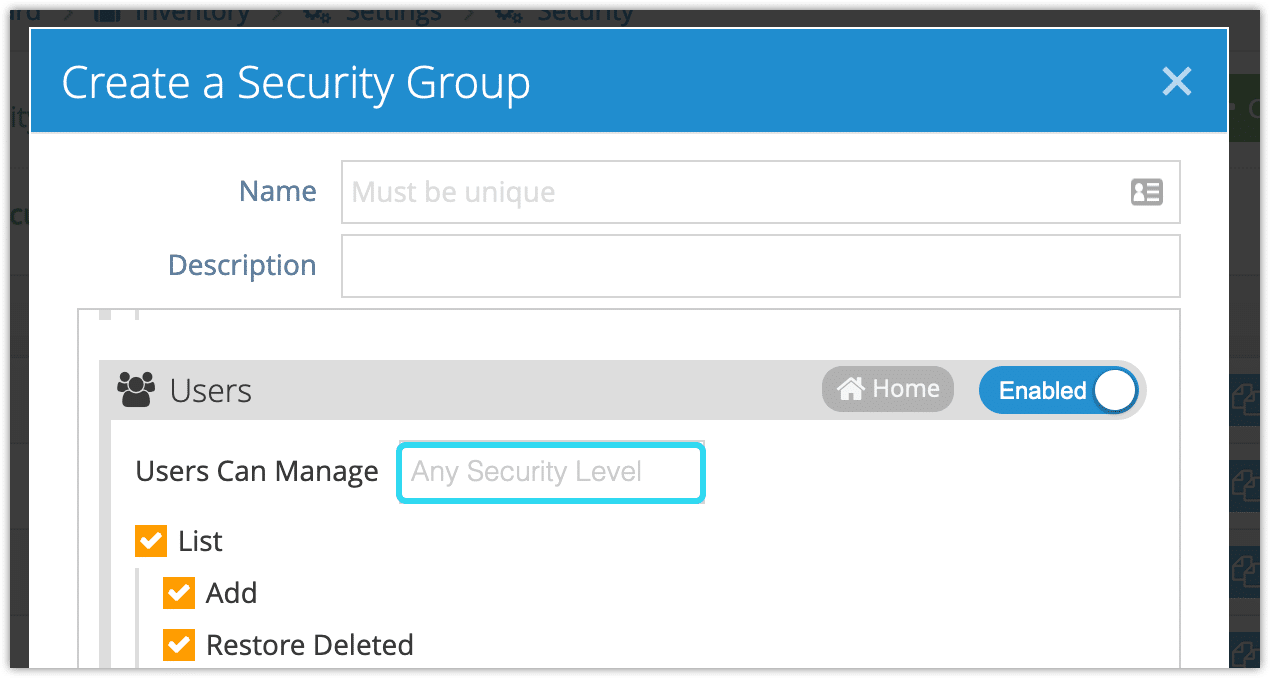
7. Select which users these users should be able to manage. If you give users access to security groups with permissions they lack, they may be able to access those permissions.
7. Click Create Security Group when you’ve finished configuring it (6).
Duplicate a Security Group
If you’d like to create a security group that’s very similar to one that already exists, you can duplicate the existing group.
1. Locate the security group you want to duplicate.
2. Click Duplicate.

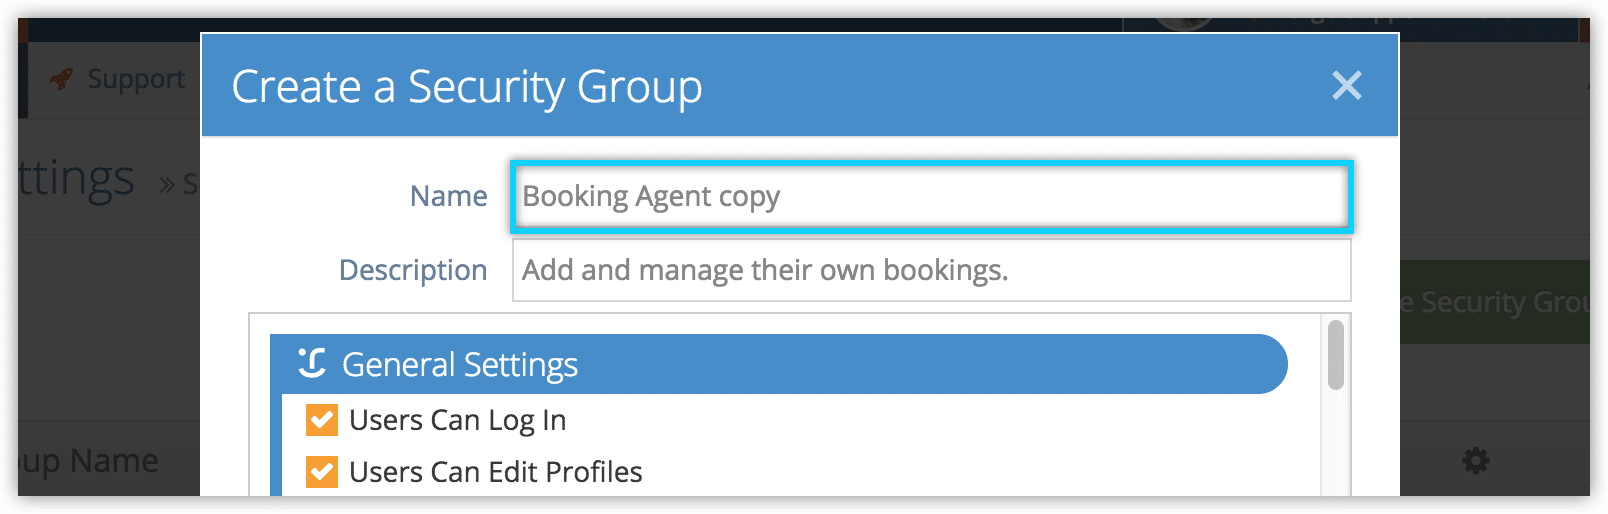
3. Make any necessary adjustments to the security group. By default its name will be a copy of the original.
4. Click Create Security Group.