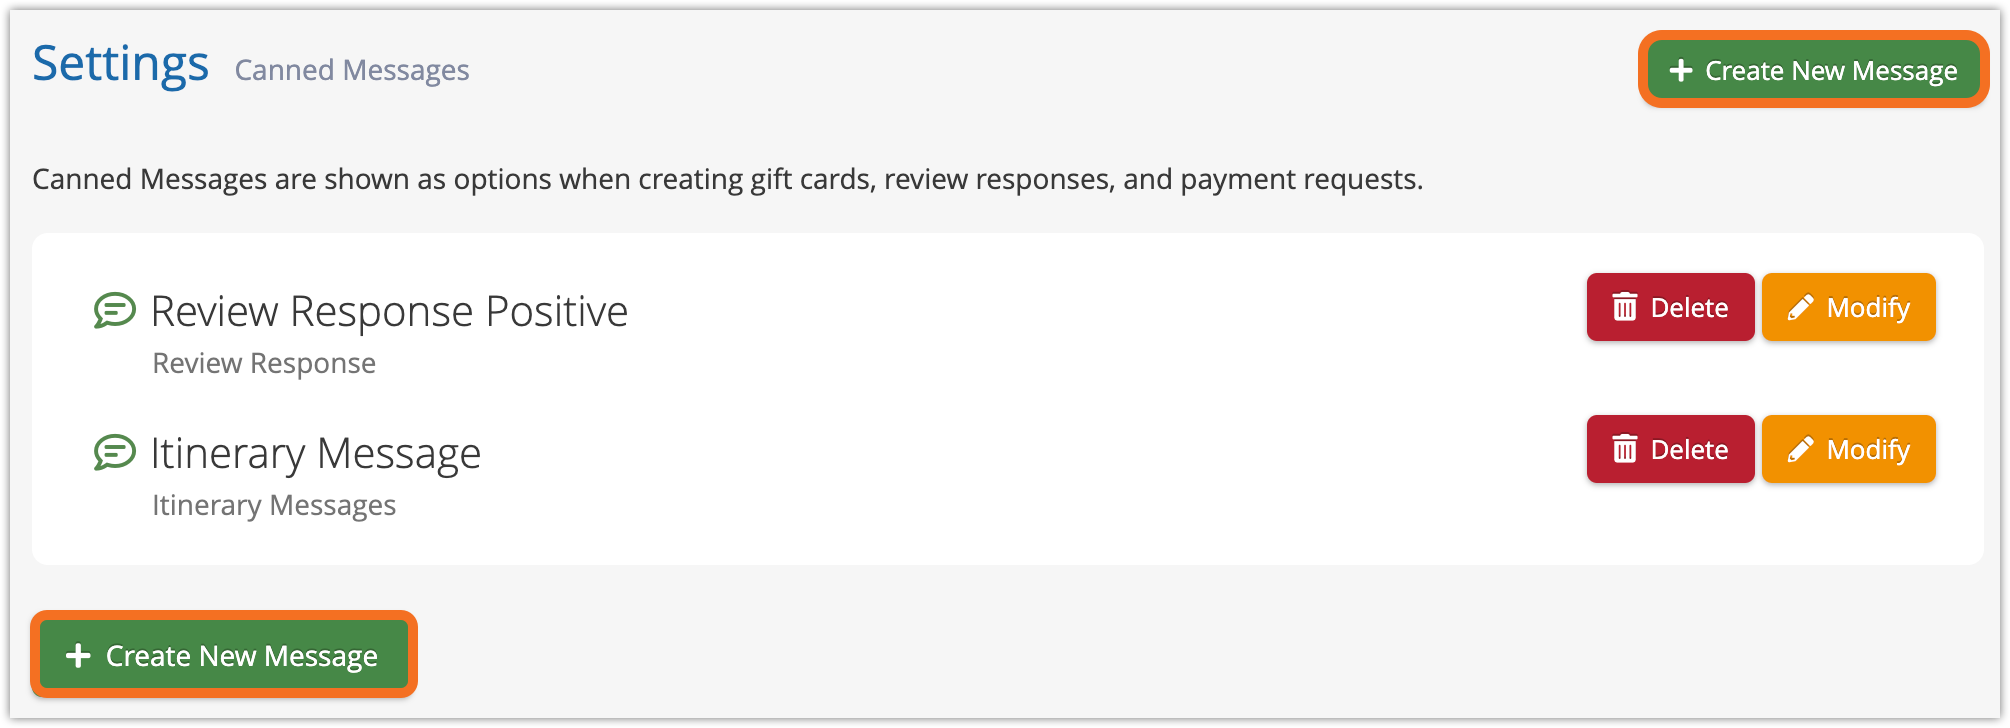
How to created canned messages
Canned messages can save you time when responding to reviews, sending gift cards, sending payment requests, sending itineraries, and messaging events.
To create a canned message, go to Settings > Canned Messages.
1. Click Create New Message.
2. Give the message a descriptive name (A)
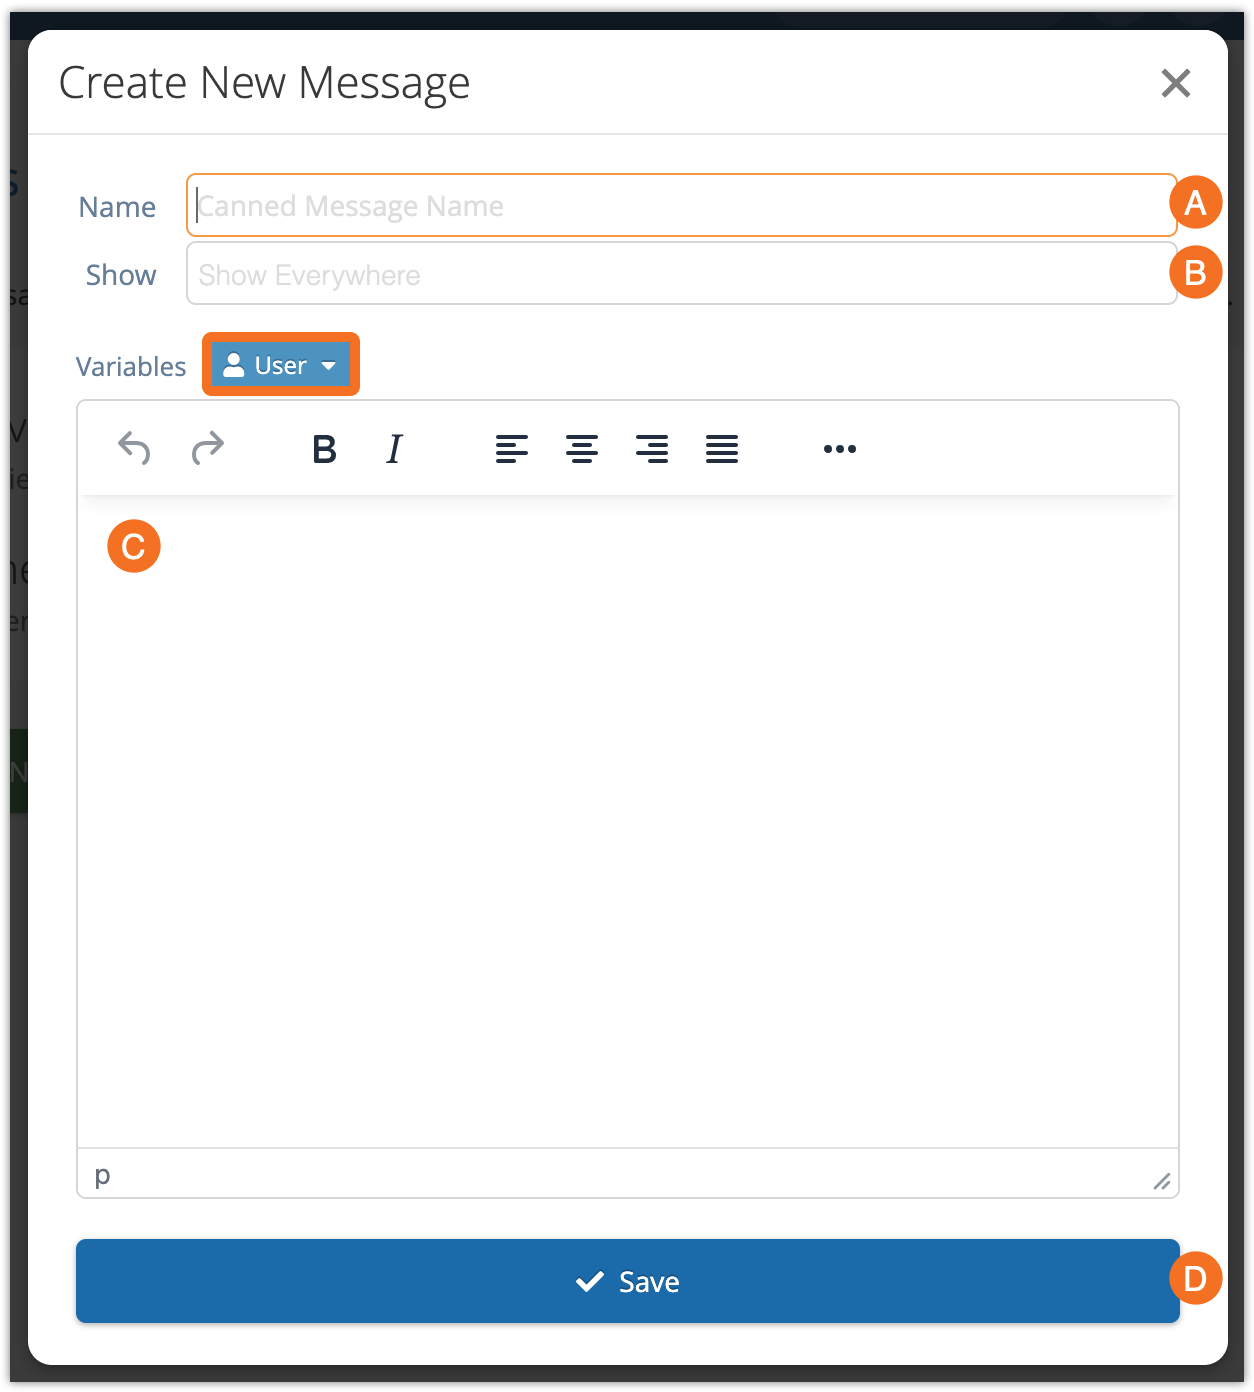
3. Choose where the canned message will be shown (B). “Show Everywhere” will offer the message everywhere canned messages will be used, but you can also choose a specific place for it to be brought up, like when sending review responses or payment requests. You can also choose multiple.
4. Enter your message content (C). You can include user variables like first name, last name, email and phone number (highlighted above). You can also include HTML, but this will only be included when messaging event groups, not for payment requests, itineraries or gift cards.
Please note: variables will not be filled out when sending payment requests for reconciliations or when messaging events, since those features don’t have access to user data. If you plan to use the message for events or reconciliations, you shouldn’t include user variables.
5. Click Save (D).
Once you create canned messages, you can select them when sending a message as long as that message type was selected in the Show For field.