How to set up multifactor authentication
Multifactor authentication (MFA, also known as two-factor authentication or 2FA) adds an extra layer of security for users logging into your Rezgo account. Once enabled, users will need to enter a security code when they log in. Depending on how they set their MFA up, they may get that code from the email address associated with their user account, from a text message, or from an authenticator app or device.
Enable Multifactor Authentication for your users
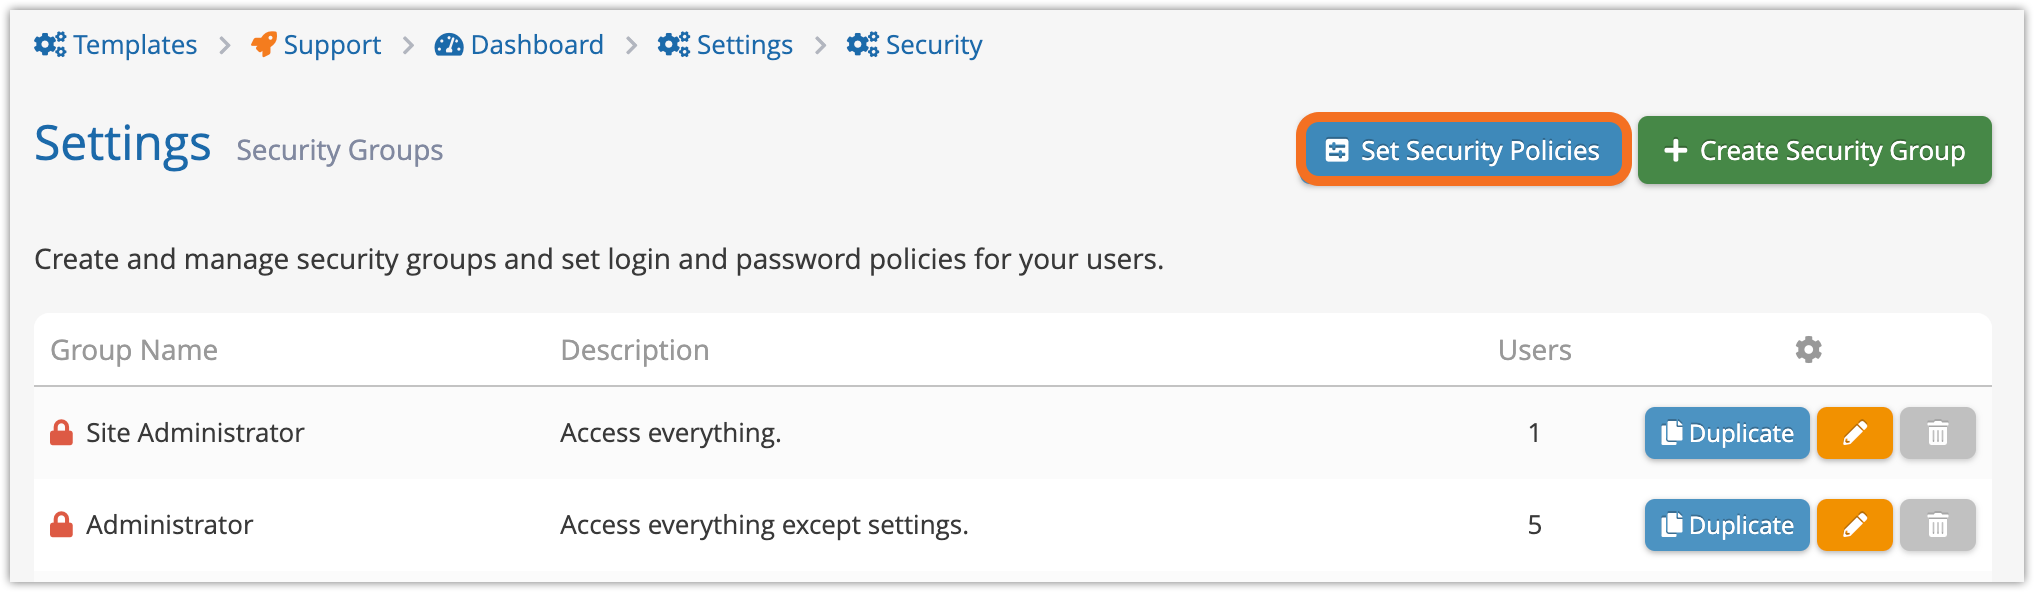
To enable multifactor authentication for your company’s Rezgo account, go to Settings in the main menu and click Security Groups.
1. Click Set Security Policies.
2. Toggle Require MFA (A).
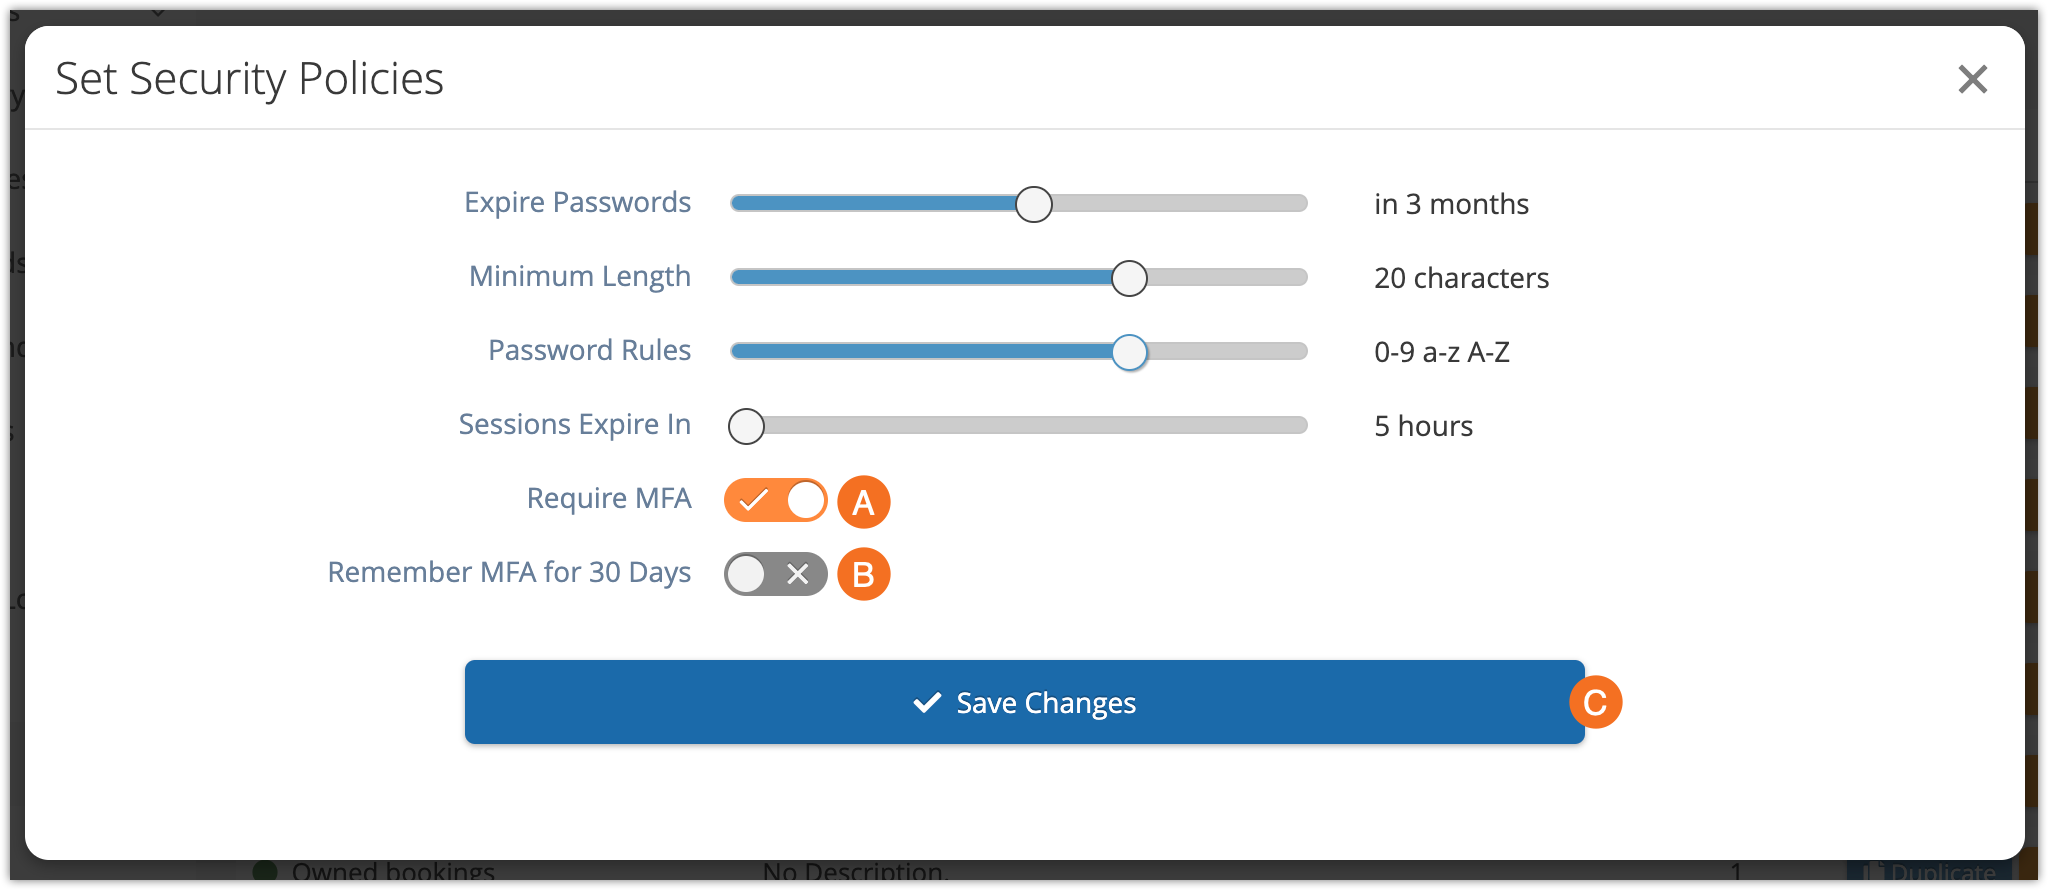
3. Toggle whether or not the system should Remember MFA for 30 days (B). If so, users won’t need to re-authenticate until they change devices or 30 days pass. If not, they will need to re-authenticate every time they log in.
4. Click Save Changes (C).
Set up Multifactor Authentication for your account
The first time you login after MFA is enabled, you’ll be asked to attach an authenticator. This will also happen for any other Rezgo users in your company.
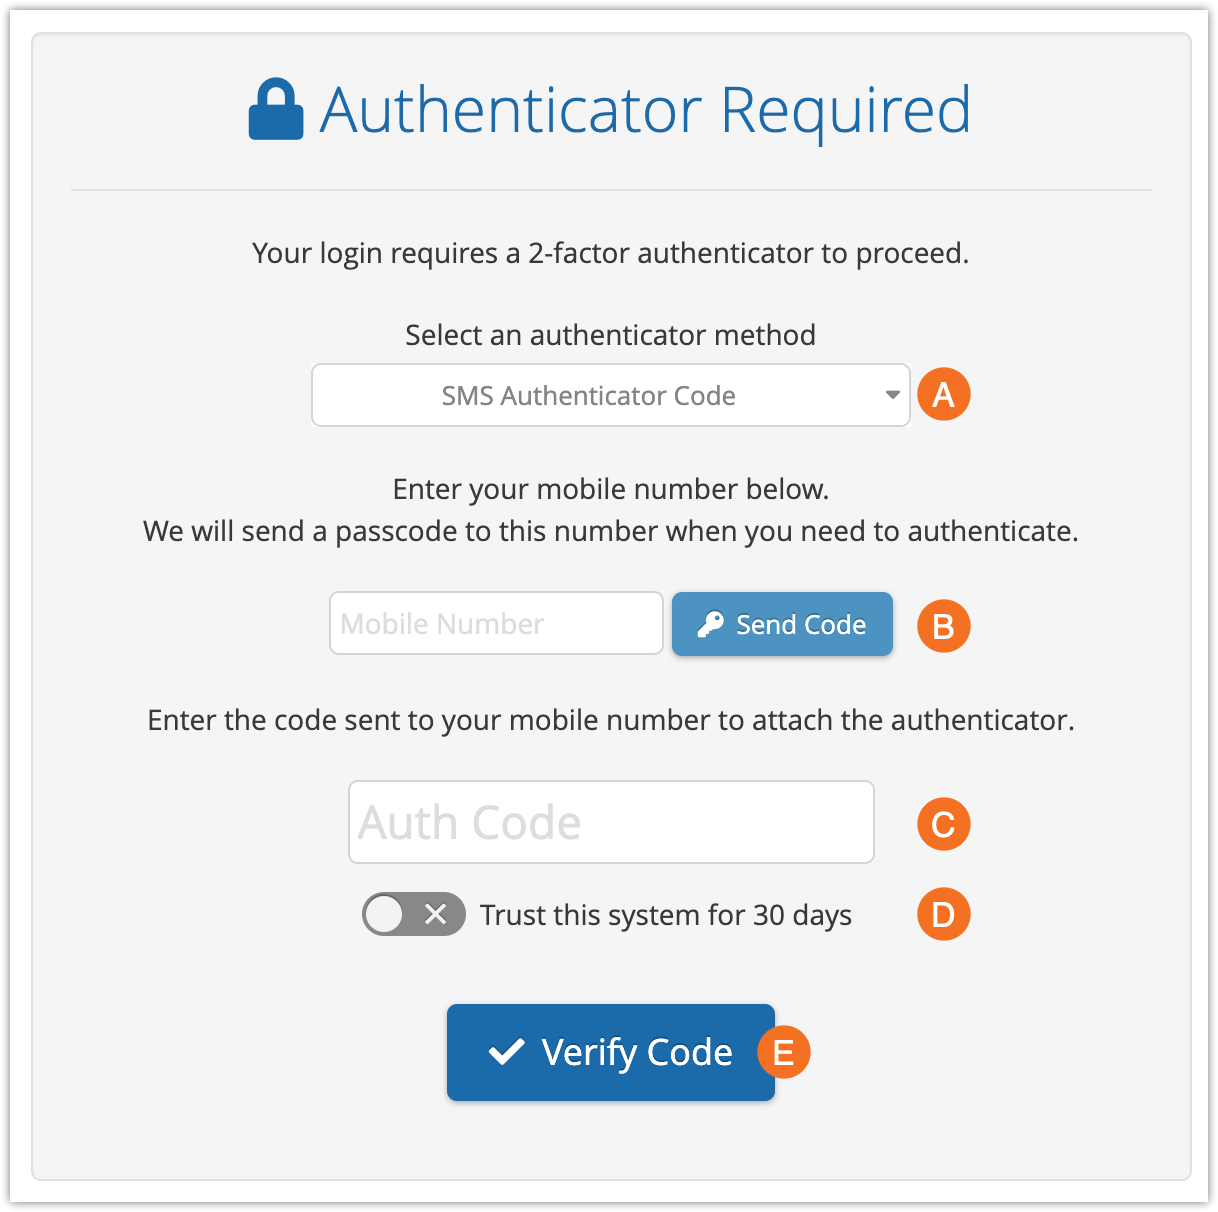
1. Select which type of authentication to use (A). There are three options:
- Authenticator App: These are apps like Authy or Google Authenticator (iOS or Android). This is one of the strongest types of authentication, because it requires you to have your device in hand and log into it before accessing the code.
- SMS Authenticator: When you log in, a code will be sent to the phone number you enter.
- Email Authenticator Code: When you log in, a code will be sent to the email address attached to your Rezgo user account.
2. Follow the instructions for setting up your authentication method.
- Authenticator apps will ask you to scan the QR code shown, and then walk you through the steps of setting up your account.
- For SMS codes, enter your mobile phone number in the field, then click Send Code (B).
- For email codes, confirm that the email address shown is correct, then click Send Code (B).
3. Enter the code you receive in the Auth Code field (C).
– If available, you can toggle Trust this computer for 30 days (D) to remain authenticated on your current device for 30 days. This is not recommended for shared computers.
4. Click Verify Code (E).
Manage Multifactor Authentication for your users
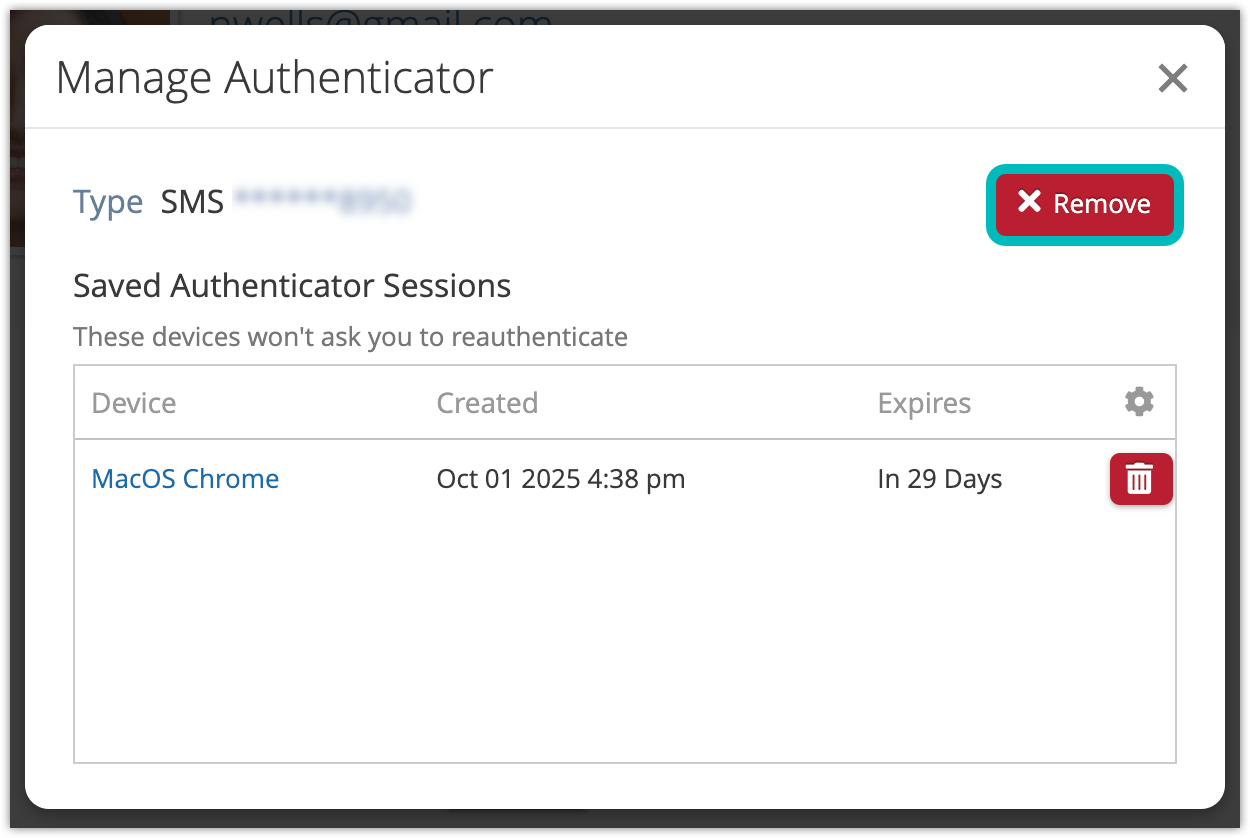
You can remove a users’ MFA if needed. This usually comes up because they lost their phone or lost access to their authentication app. You can also close out any current sessions (if they said ‘trust this computer for 30 days’ on a shared computer, for example).
1. Go to the users’s details page.
2. Click Manage next to the authenticator.

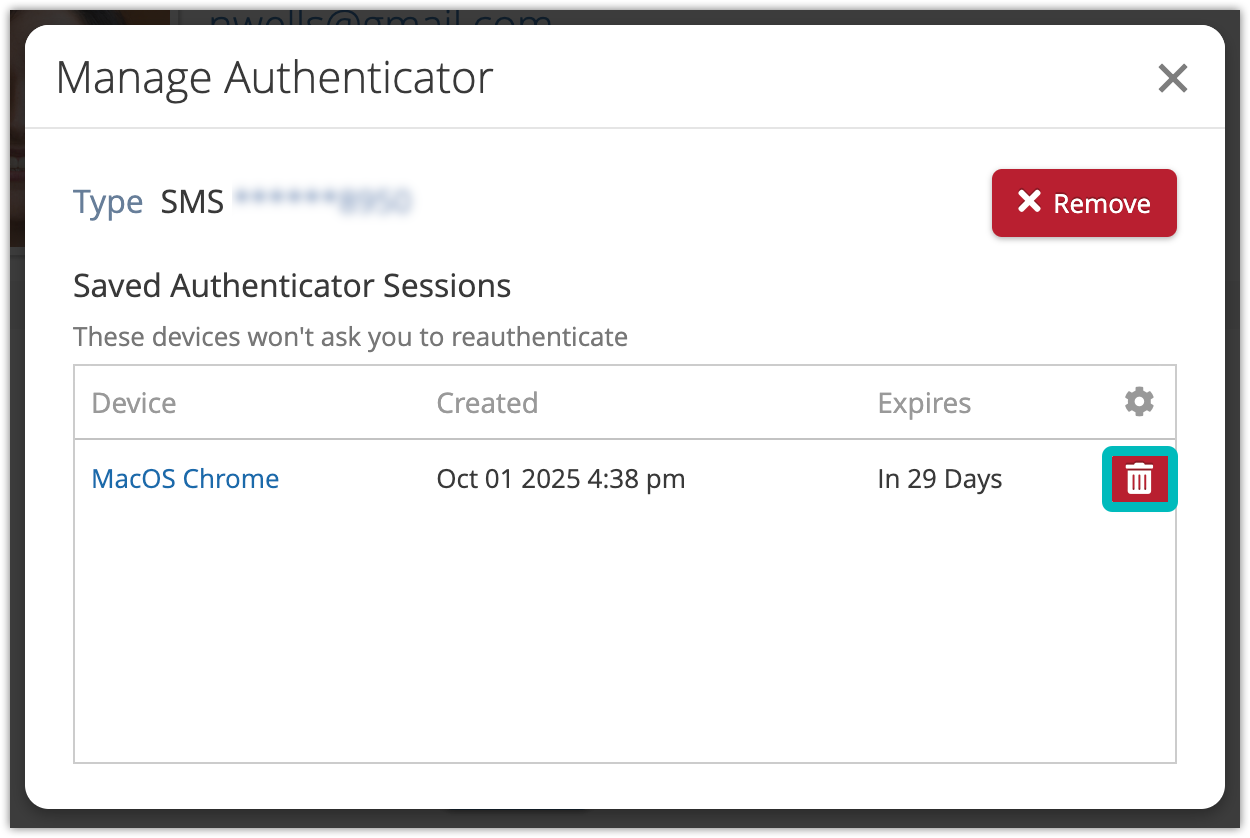
Remove the authenticator
To remove the authenticator, click Remove.
Click OK to confirm.
The user will need to re-add an authenticator the next time they log in.
Remove a saved session
To remove a saved authenticator session, click the delete button beside the session.
Click OK to confirm.
The user will need to reauthenticate the next time they log in on that device.