How to manage scheduled reports
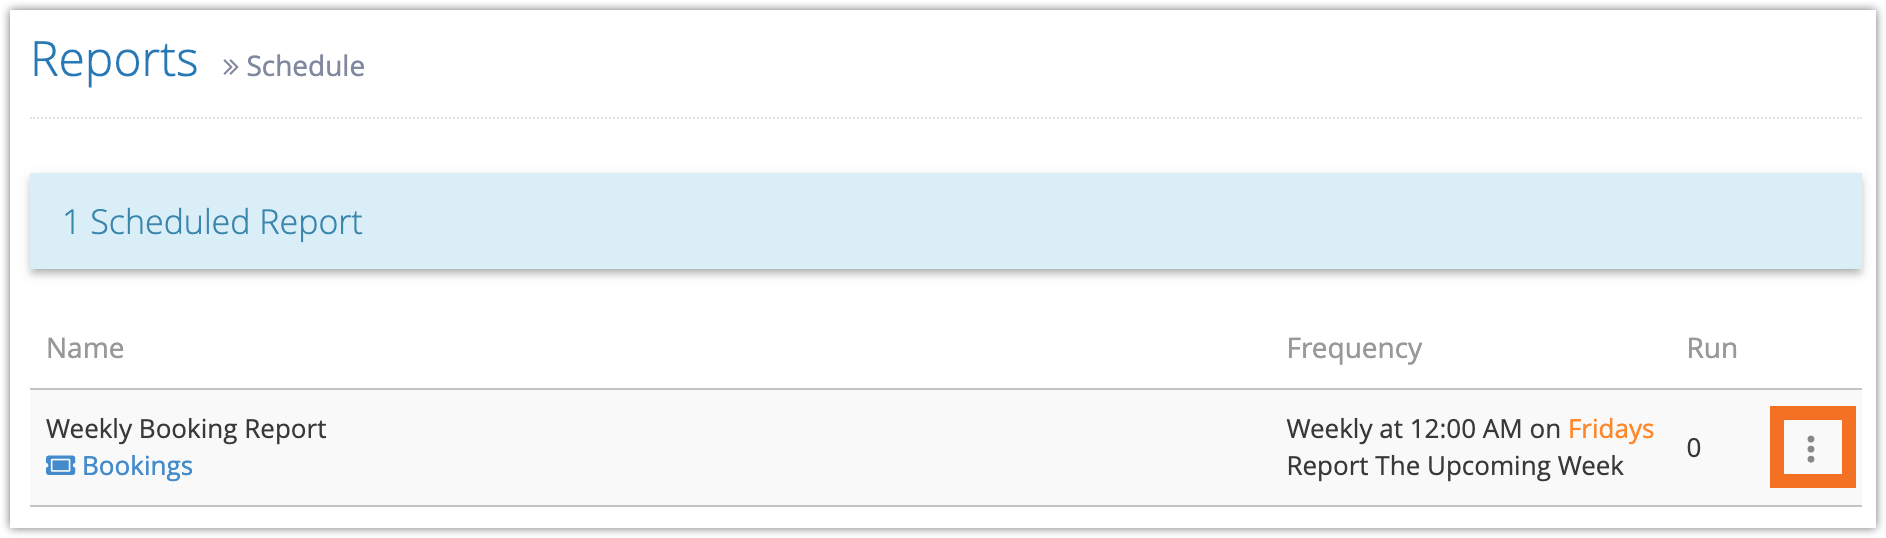
To manage a scheduled report, go to Reports in the main menu.
1. Click Scheduled Reports.

2. Click the action button next to the report you want to manage.
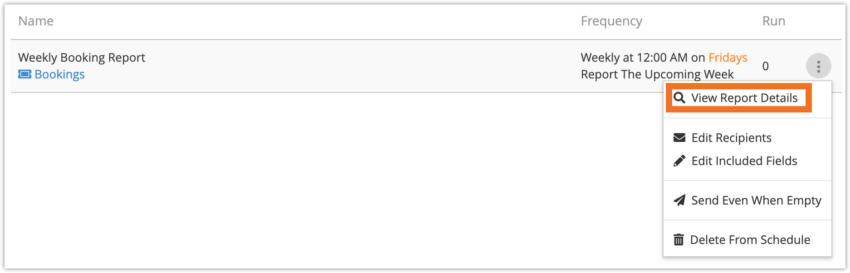
From here, you can make several changes to your scheduled reports:
View a Report’s Details
To look at the details of how reports are being generated, click View Report Details.
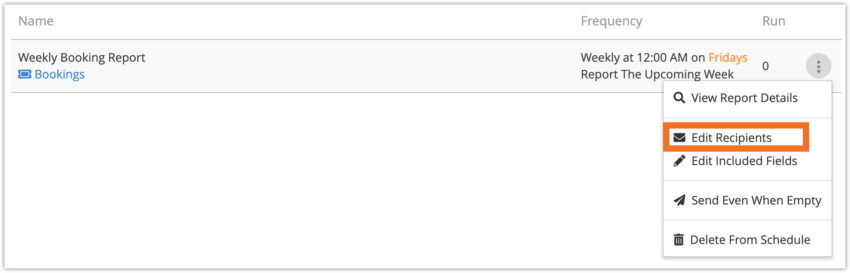
Edit a Scheduled Report’s Recipients
To edit a scheduled report’s recipients, click Edit Recipients.
Enter the new recipients in the email field (1) .
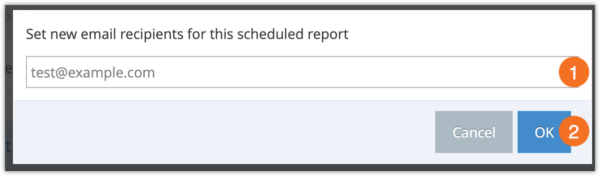
Click OK (2).
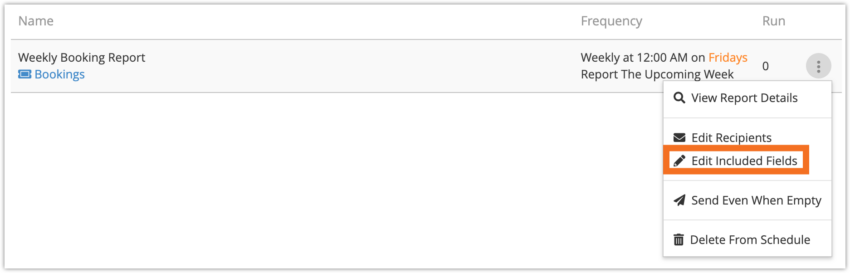
Edit a Scheduled Report’s Fields
To edit the fields included in a scheduled report, click Edit Included Fields.
1. Check any fields you want to include, or uncheck any you don’t want to include.
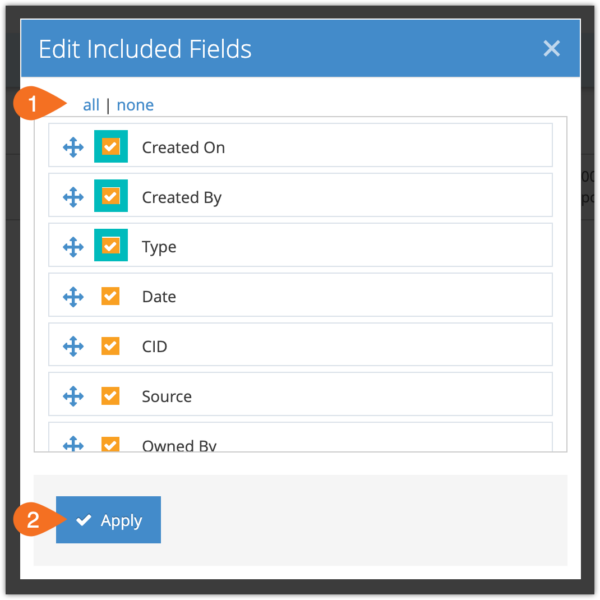
2. You can also click all to select all the fields (1), or none to clear all the fields.
3. Click Apply (3)
Send Empty Reports
If you want a report to be sent to recipients even if there are no results for the set time period, you can do so by clicking Send Even When Empty.
If you change your mind, you can click Do Not Send When Empty in the same place.
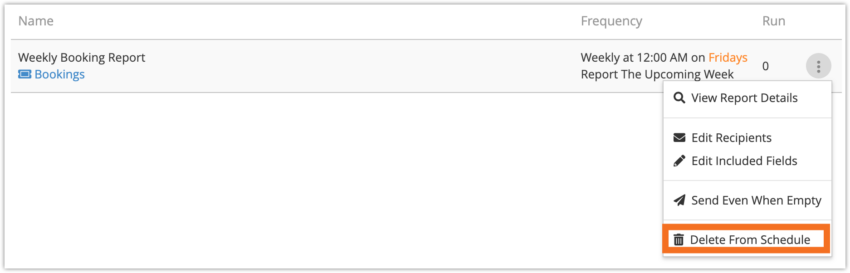
Delete a Scheduled Report
To delete a scheduled report, click Delete From Schedule.
Click OK to confirm.