How to offer paid add-ons with your inventory
With Rezgo, you can offer paid add-ons with your inventory options so your customers can add them to their bookings.
Normally, this is done with custom forms. You can learn all about custom forms here, but in this article, we’ll look at two specific types of custom forms: price checkboxes, and price dropdowns.
(If you need to track stock or staff for more complex paid add-ons, like rentals or guided extras, you can make packages that include resource-based options instead.)
Create add-ons with price checkboxes
First, edit the option you want to attach the add-on to.
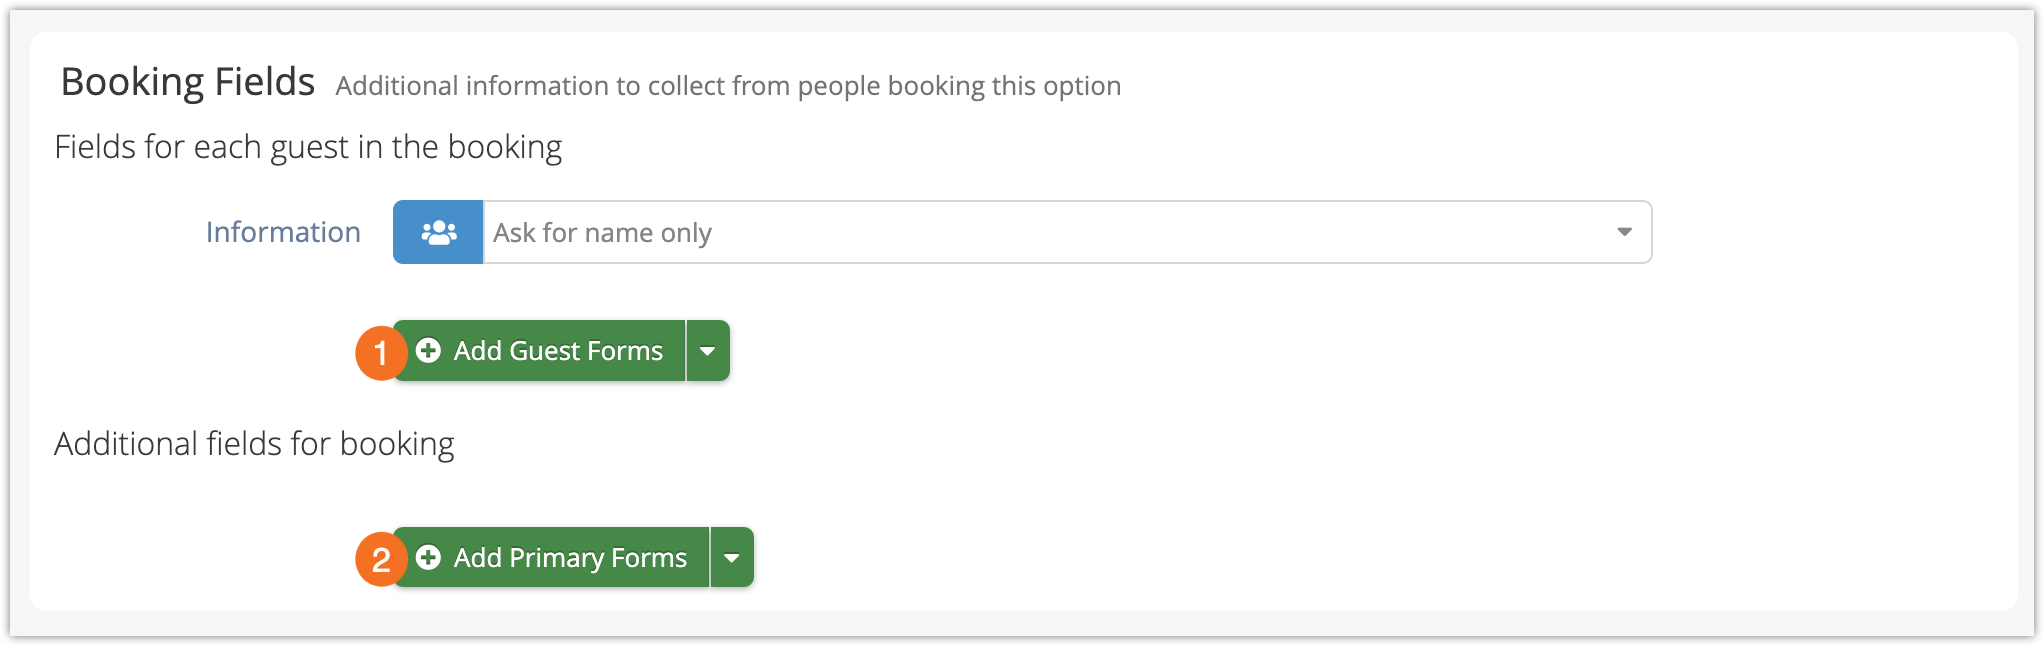
1. Under Booking Fields, click the button the type of add-on you want to offer.
- A Guest Form (1) lets you offer the add-on for each guest in the booking.
- A Primary Form (2) lets you offer the add-on once for the whole booking.
2. Decide where you want to show the field (1). For a paid add-on, this will usually be everywhere, but you can limit it to the point of sale only.
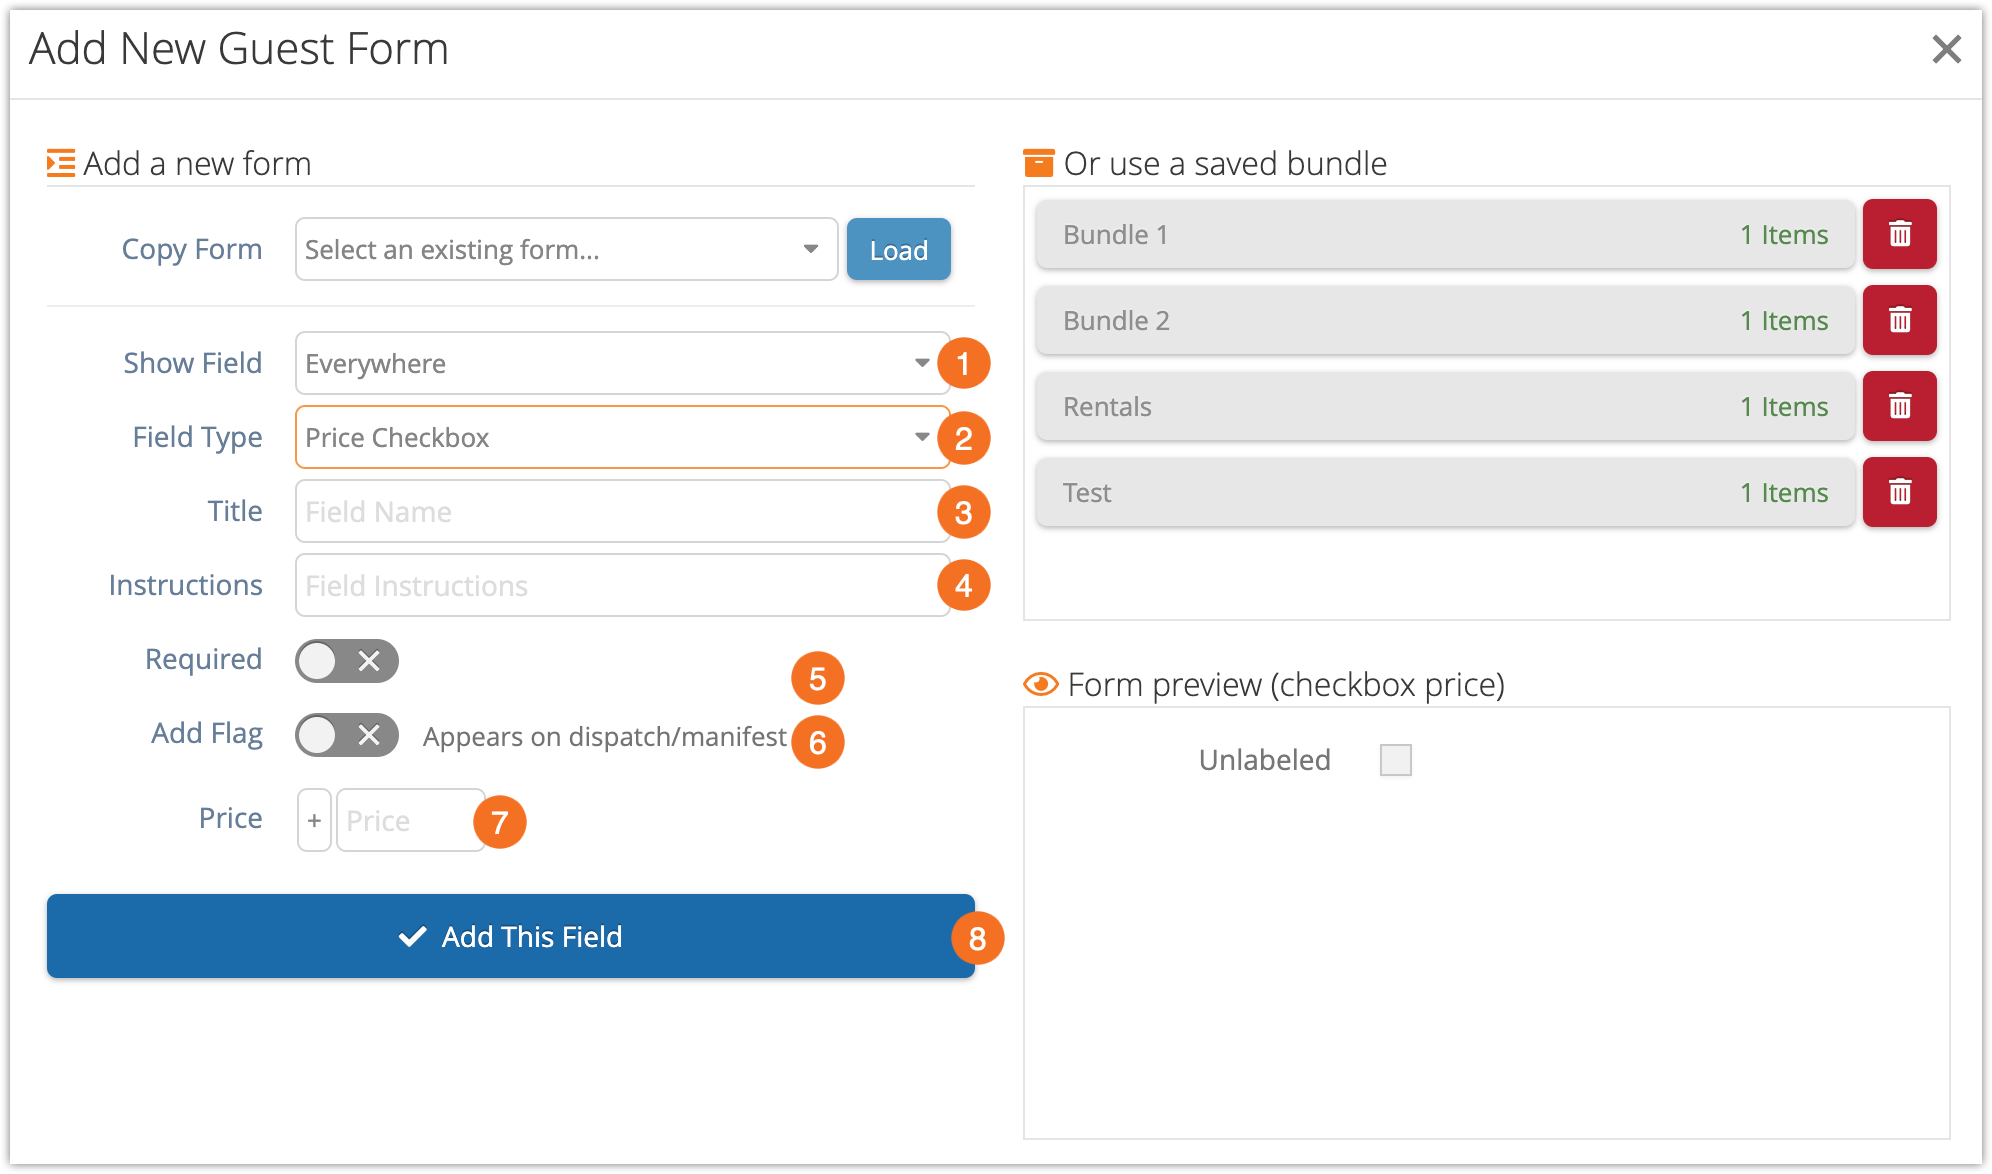
3. Select a Field Type (2). For a single add-on, use Price Checkbox.
(We’ll go over Price Dropdowns in the next section–they’re used for choosing one of several add-ons.)
4. Enter a Title (3). This is what the add-on will be labelled for your guests, so make it clear.
5. Enter any Instructions you want to show your guests (4). This should briefly explain what they’re paying for.
6. Toggle whether you want the add-on to be required (5).
Usually, this should be left off for paid add-ons. If it’s turned on, the customer will be required to include the add-on, so it’s only recommended for situations like mandatory fees that customers needs to acknowledge.
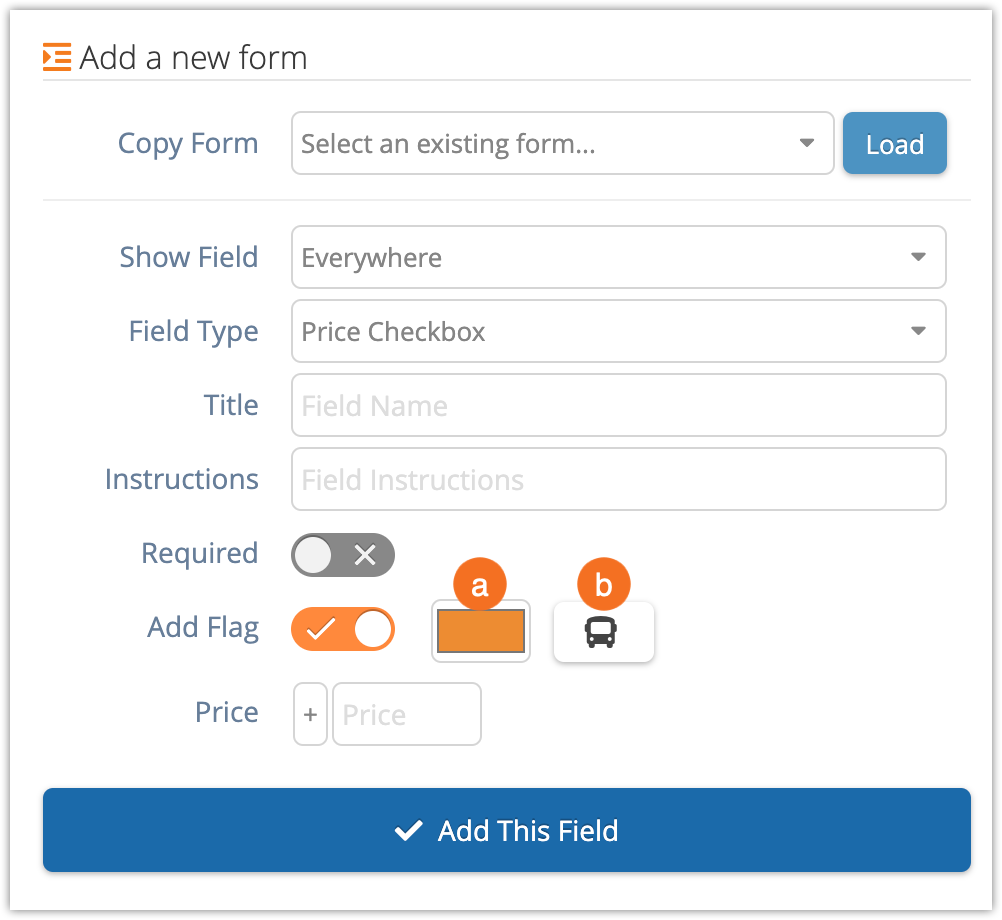
7. Toggle whether you want to flag the add-on.
If you use the daily manifest or dispatch manager, this is a great idea. If a customer clicks the checkbox, the colored icon you pick will be shown on their booking in those places, so you or your guides can see if they picked it at a glance.
If you enable the flag, you can select your color (a) and icon (b):
8. Finally, add a price (7). This amount will be added to the booking if the customer checks the price checkbox.
You can also click the + and change it to a – if you want to subtract from the booking instead.
9. Click Add This Field.
10. When you finish editing the option, click Save Changes.
Create add-ons with price dropdowns
If you want customers to choose from a selection of multiple add-ons, you can use the Price Dropdown field instead.
With a Price Dropdown, you set up Show Field, Title, Instructions and Required by following steps 1-6 above, but select Price Dropdown as the Field Type.
Setting up the pricing is a bit different, too.
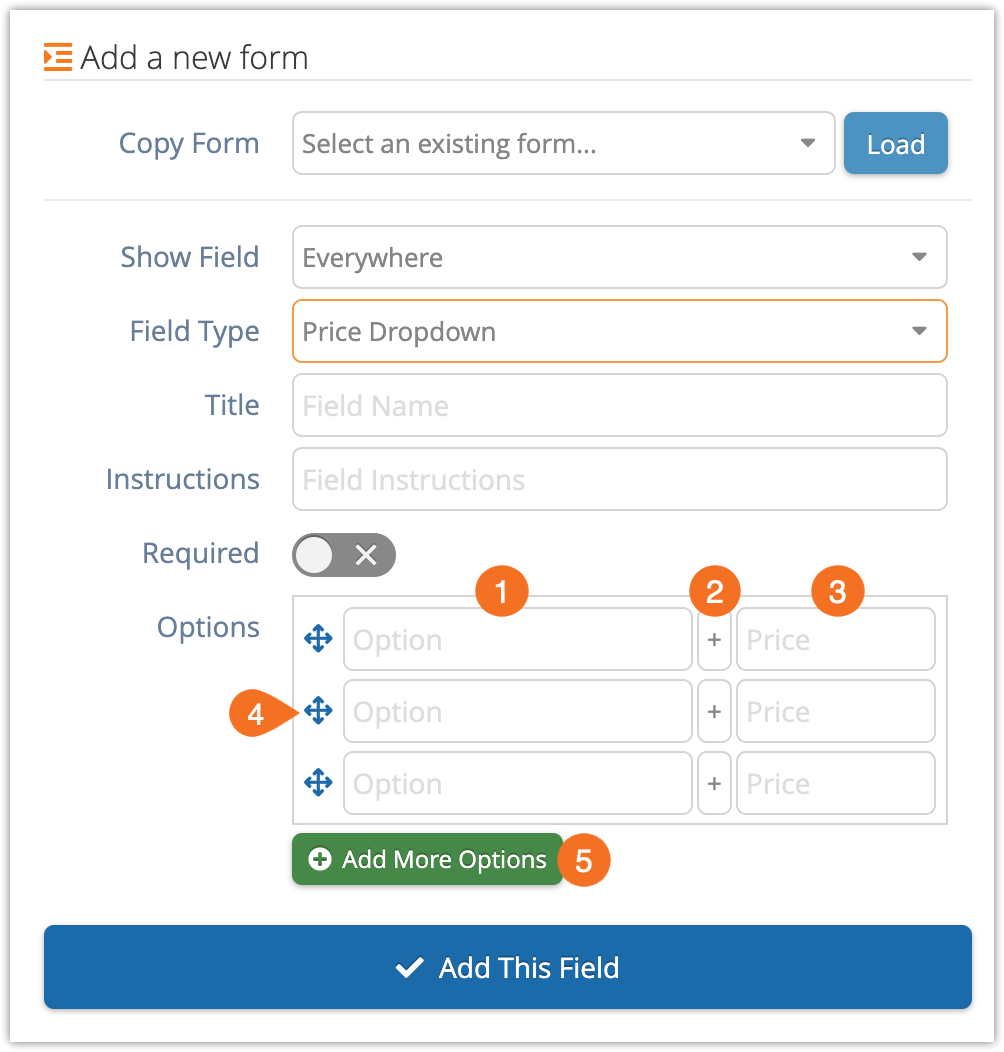
1. Enter labels for the add-ons in the Option fields (1).
2. Leave the + to add the price of the add-on to the booking total (2).
You can also click to change it to a – and subtract the price from the booking total.
3. Enter prices for the add-ons in the Price (3) fields. This is the amount that will be added (or subtracted).
4. Reorganize the entries as needed by dragging their move buttons (4) up or down.
5. Click Add More Options (5) if you need more than 3 entries.
6. Click Add This Field.
Review your paid add-ons
Once someone has made a booking with a paid add-on, you can see that they’ve done so in a few places:
- You can view your bookings’ details to see any price checkboxes or dropdowns that have been selected.
- You can see price checkbox flags and add-on details on bookings in the Daily Manifest.
- You can see price checkbox flags on bookings on the Dispatch manager.
- You can see primary form add-on details on the Bookings report.
- You can see primary and guest form add-on details on the Manifest report.
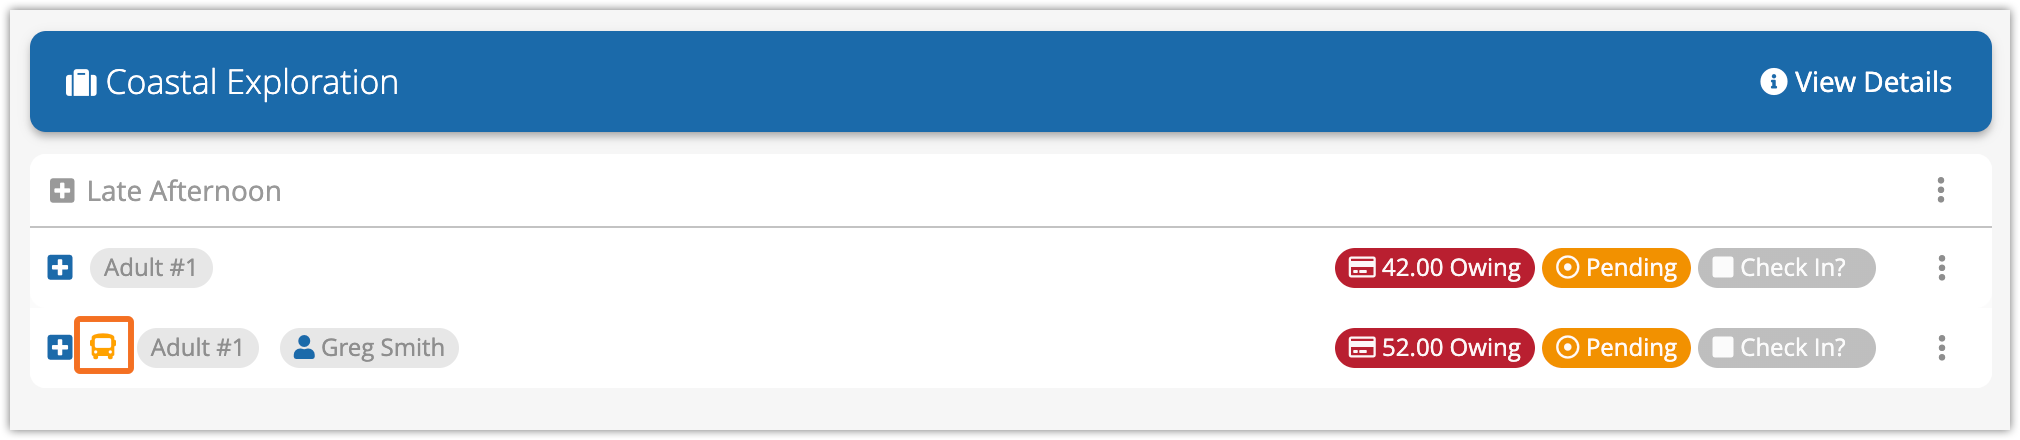
Here’s an example of a price checkbox flag on the Daily Manifest: