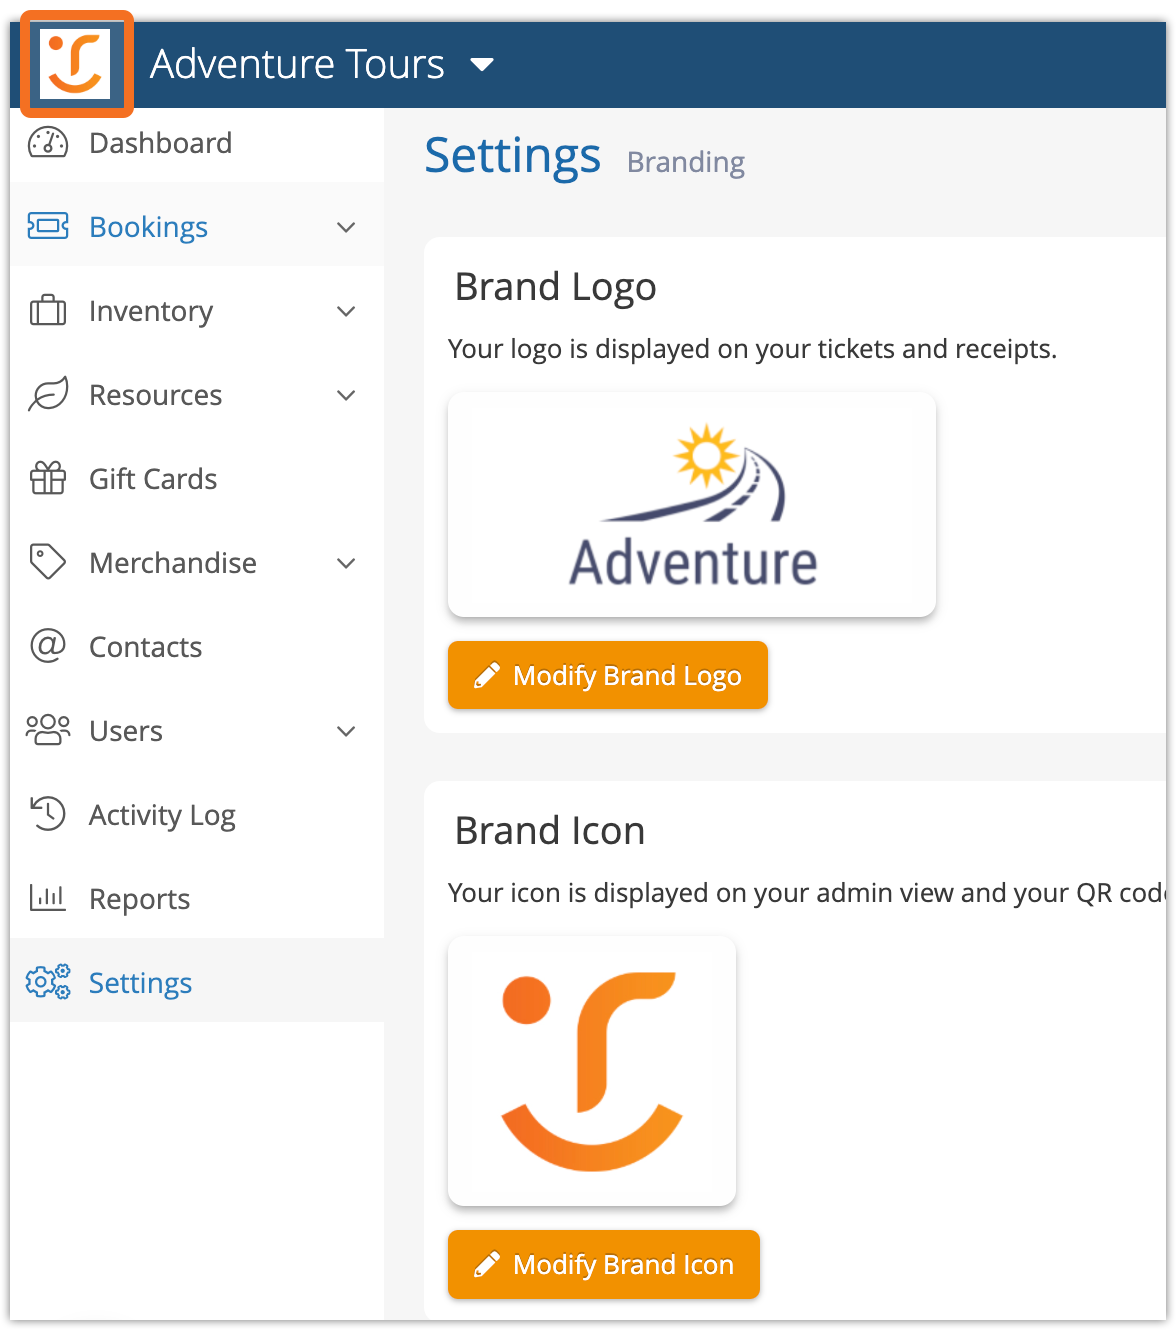
How to set a brand logo and icon
There are many ways to customize Rezgo to suit your brand. In addition to customizing your QR code and templates, you can also set a logo and brand icon.
Once set, your logo will display on your tickets. Your icon will appear in the upper-left of your company’s dashboard, replacing the Rezgo logo. It can also be added to your ticket QR code.
To set your brand icon and logo, go to Settings > Branding in the main menu.
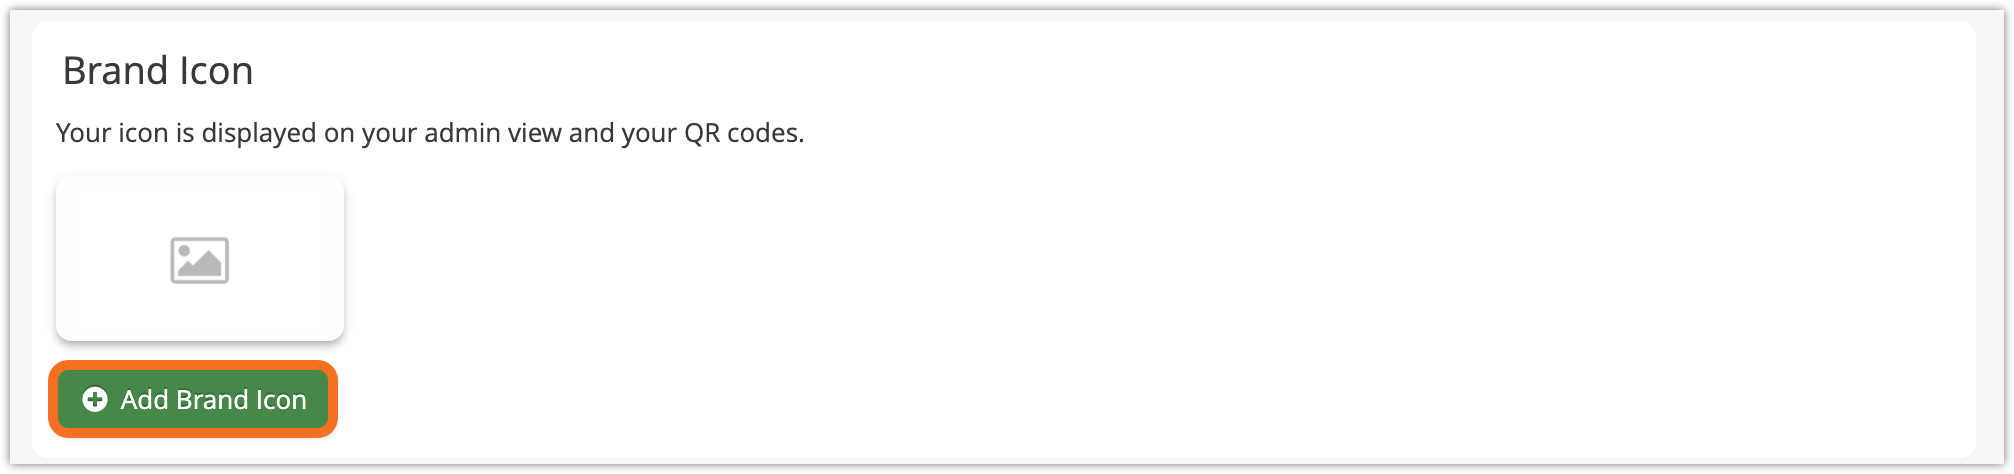
Change your brand icon
1. Click Add Brand Icon or Modify Brand Icon.
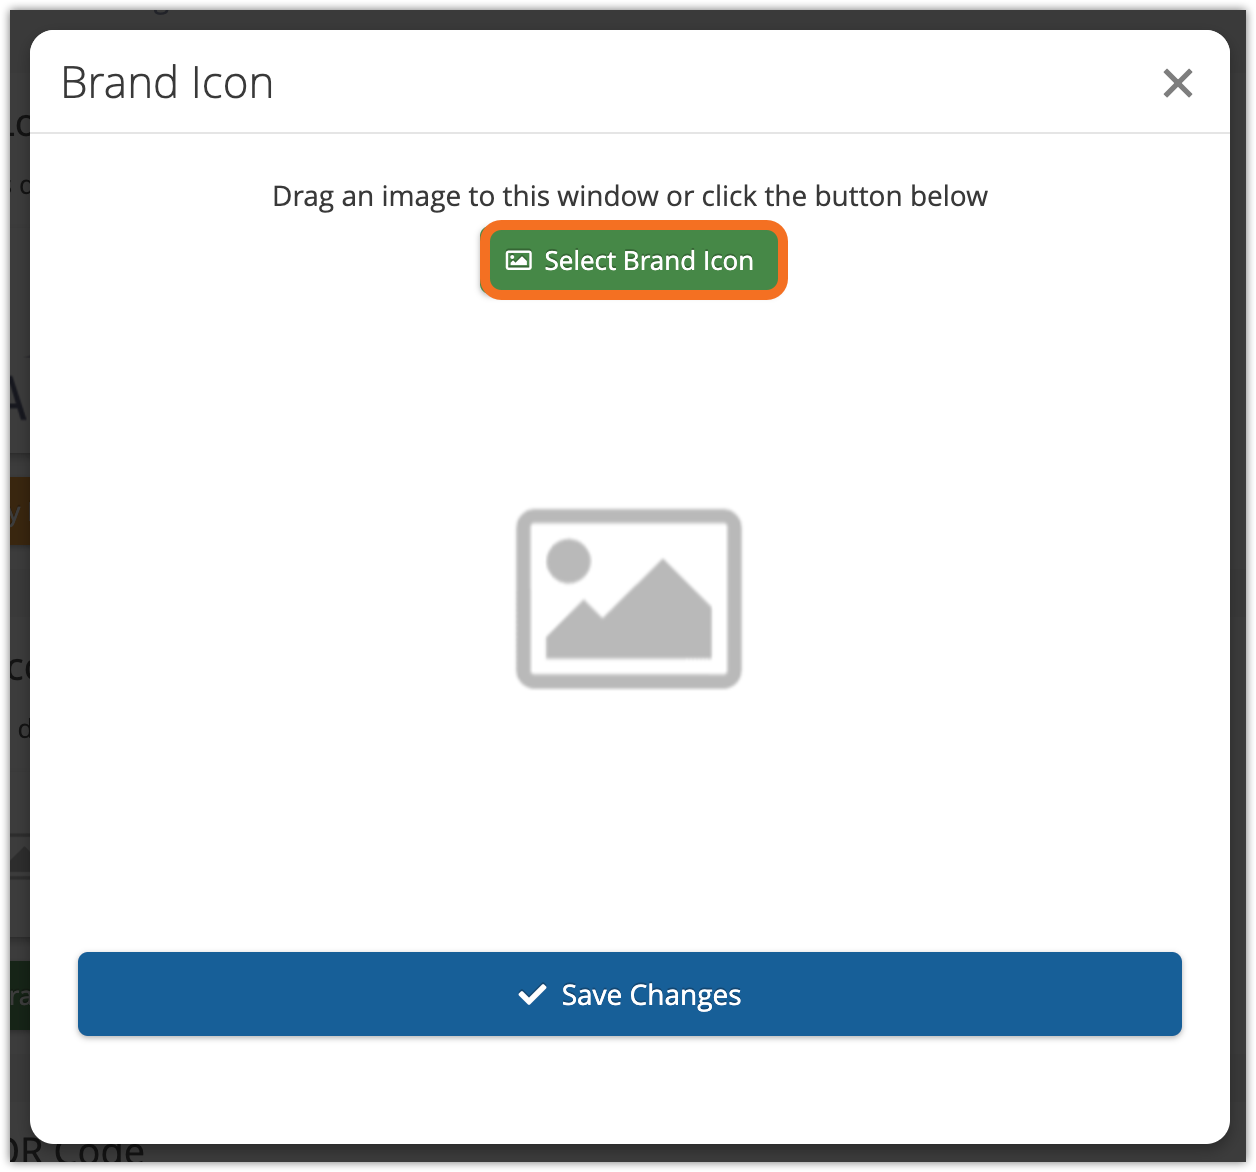
2. Drag an image into the window, or click Select Brand Icon and select your image.
3. Zoom the image until it fits well in the selection box. You can also drag the image to select the right portion of your uploaded image.
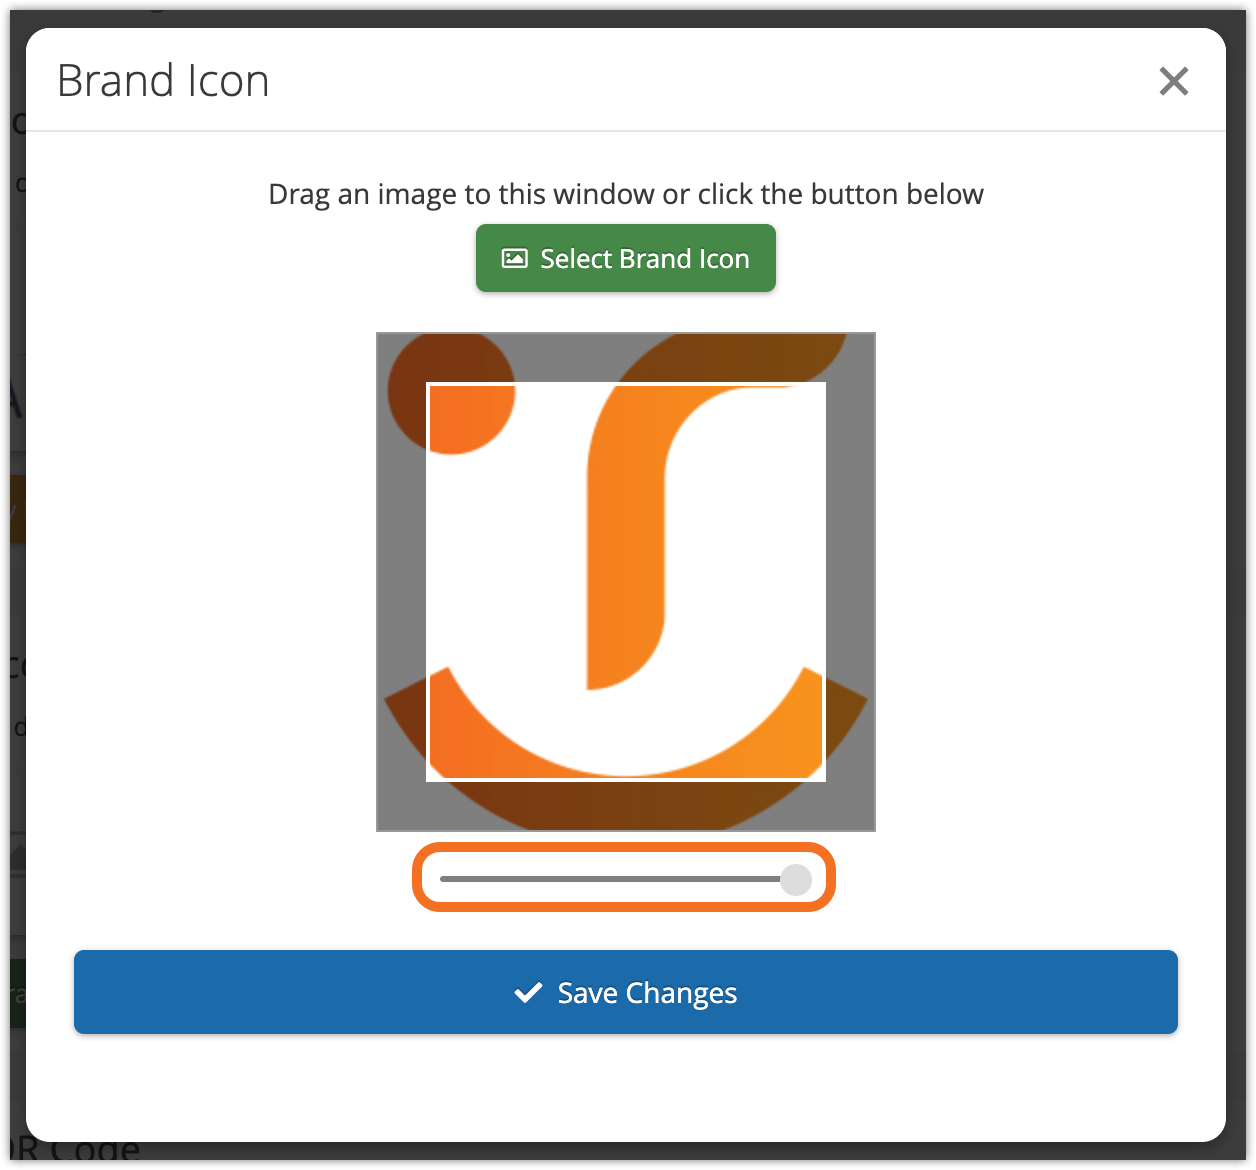
4. Click Save Changes.
You can see how your icon looks in the top left corner of the Rezgo back end, or on your QR code template.
Change your brand logo
1. Click Add Brand Logo or Modify Brand Logo.
2. Drag an image into the window, or click Select Brand Icon and select your image.
3. Zoom the image until it fits well in the selection box. You can also drag the image to select the right portion of your uploaded image.
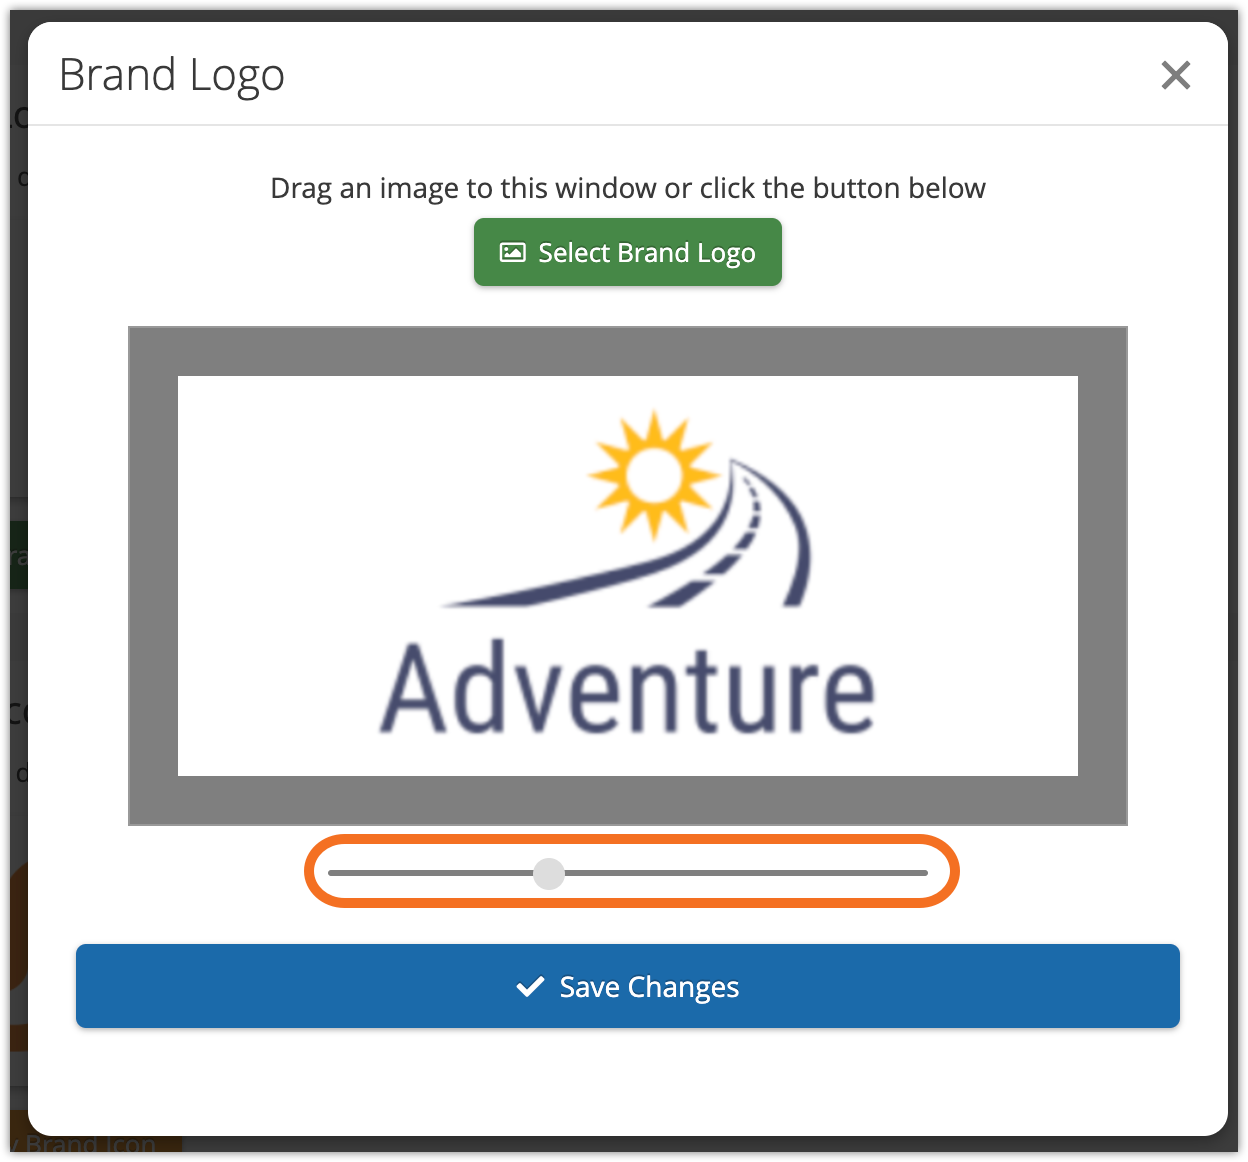
4. Click Save Changes.
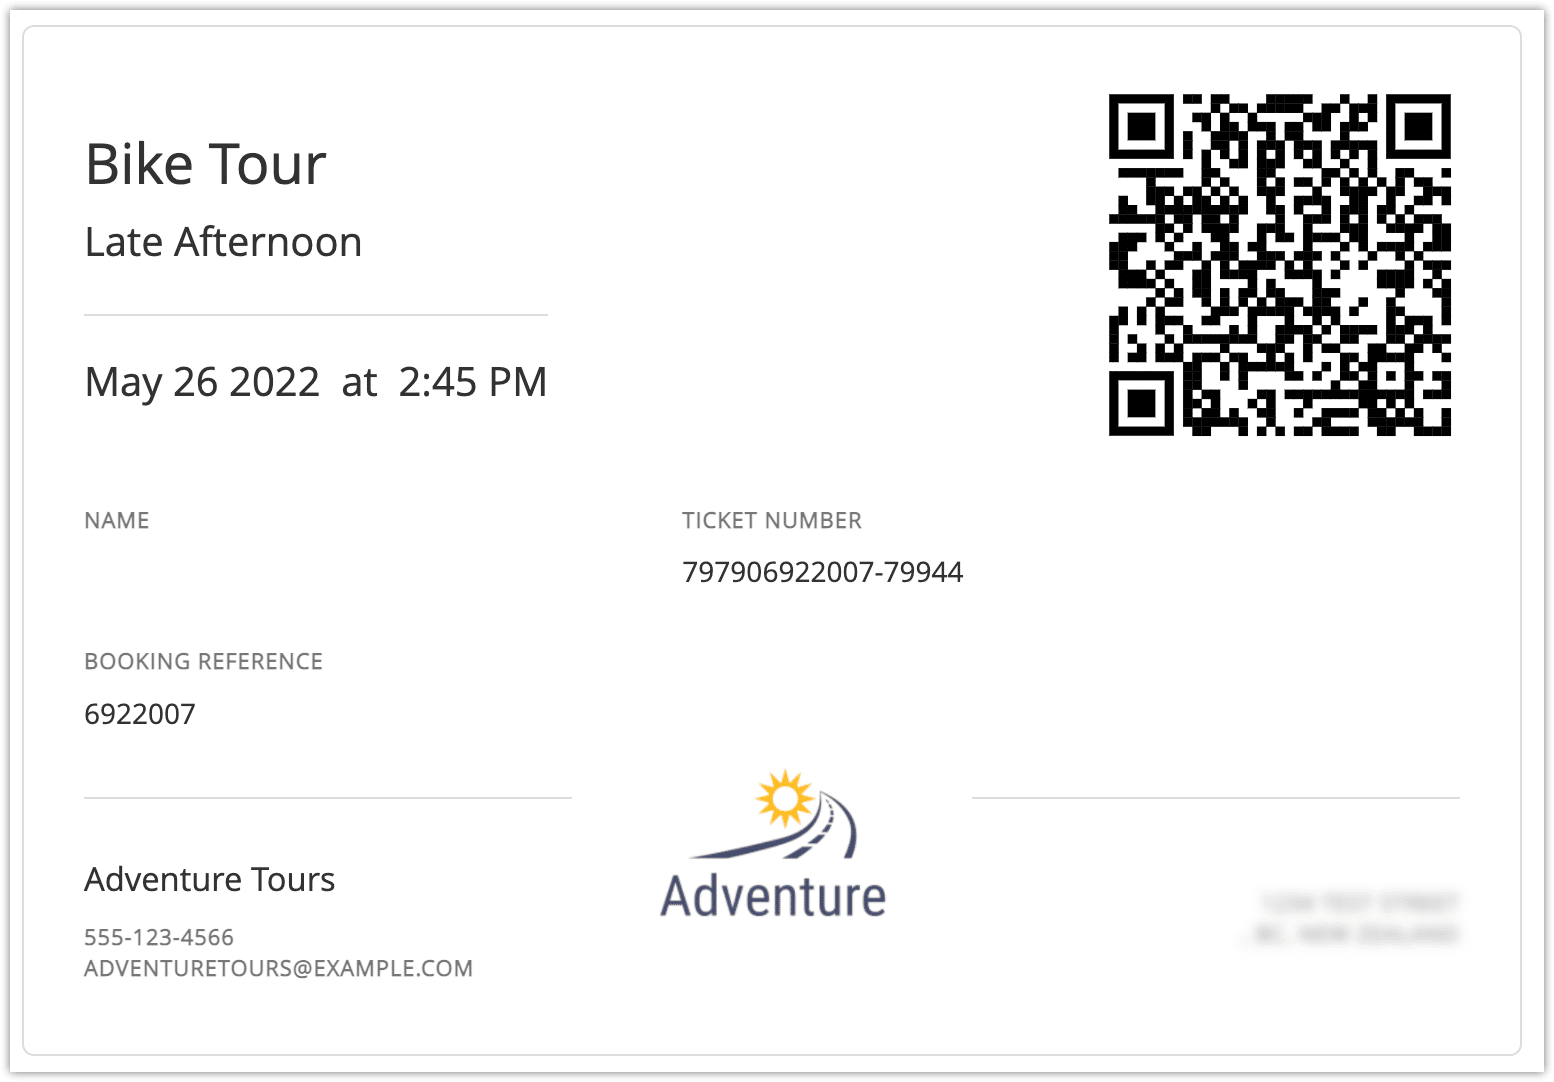
You can see how your logo looks by viewing your ticket templates or tickets:
Remove a brand logo or icon
If you want to remove your brand logo or icon, you can do so from Settings > Templates.
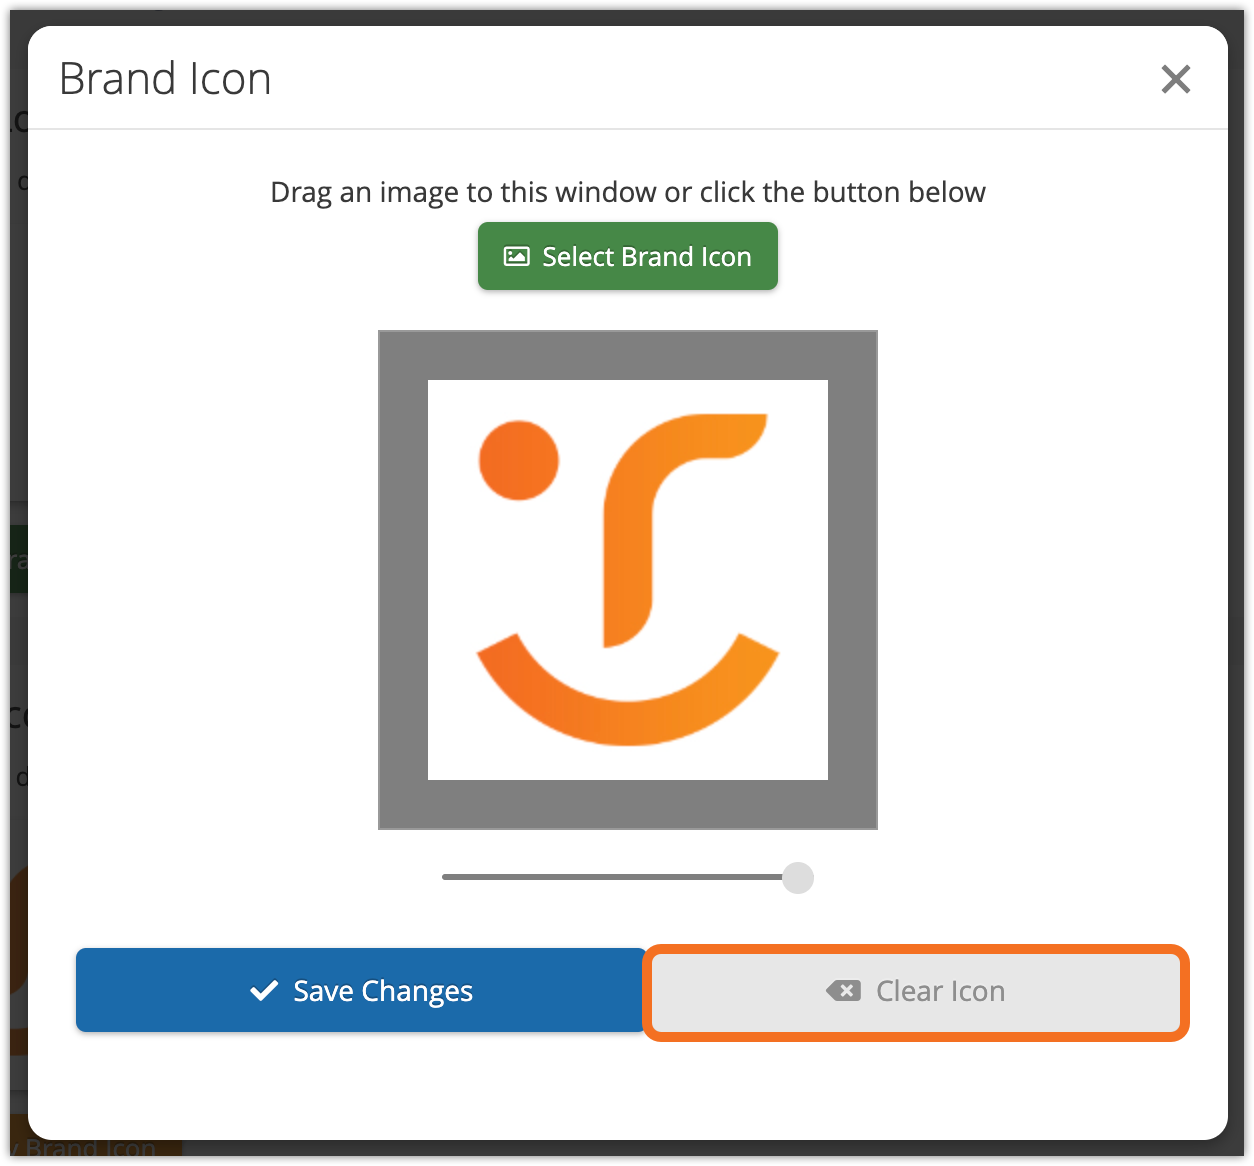
1. Click Modify Brand Icon or Modify Brand Logo.
2. Click Clear Logo or Clear Icon.