


How to create a new inventory item
Inventory items are your tours, activities, events—whatever you want to make available to your customers. Creating inventory items is one of the first steps of setting up your Rezgo website.
If you want to duplicate an existing inventory item, visit this support page. If you want to create a new inventory item, follow these steps:
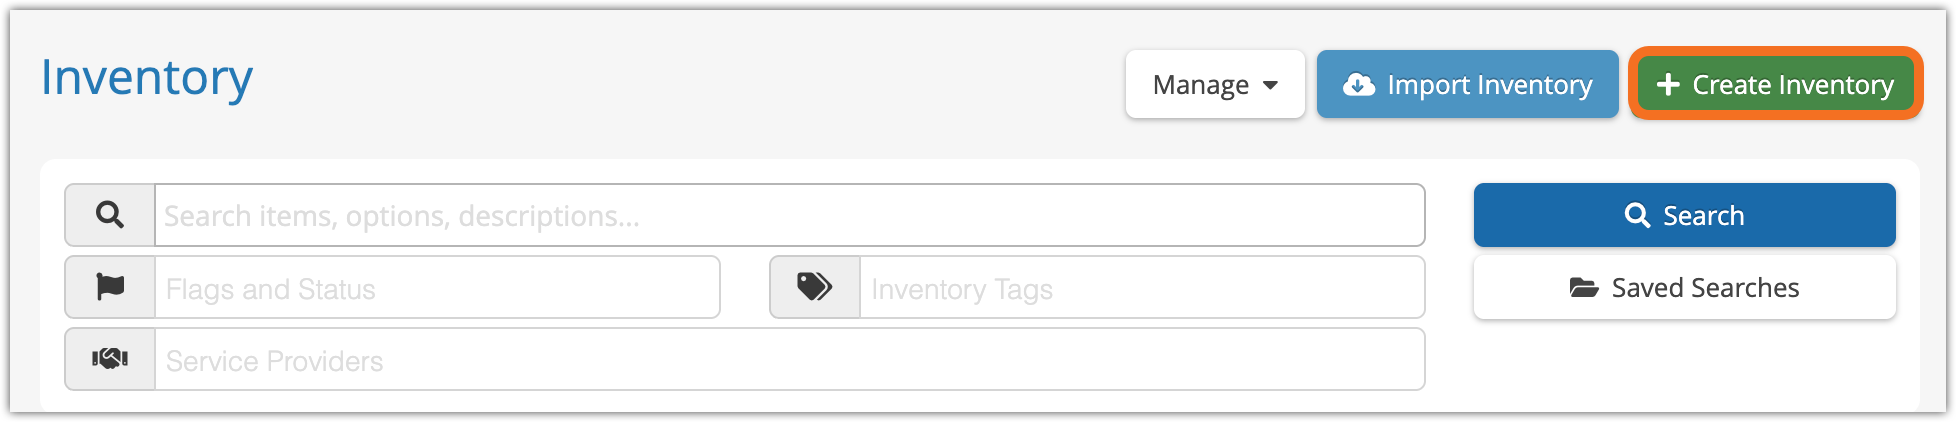
1. Go to Inventory in the main menu.
2. Click Create Inventory. This may be shortened to Create on smaller screens.
3. Fill out the name of your inventory item in Item field (A).
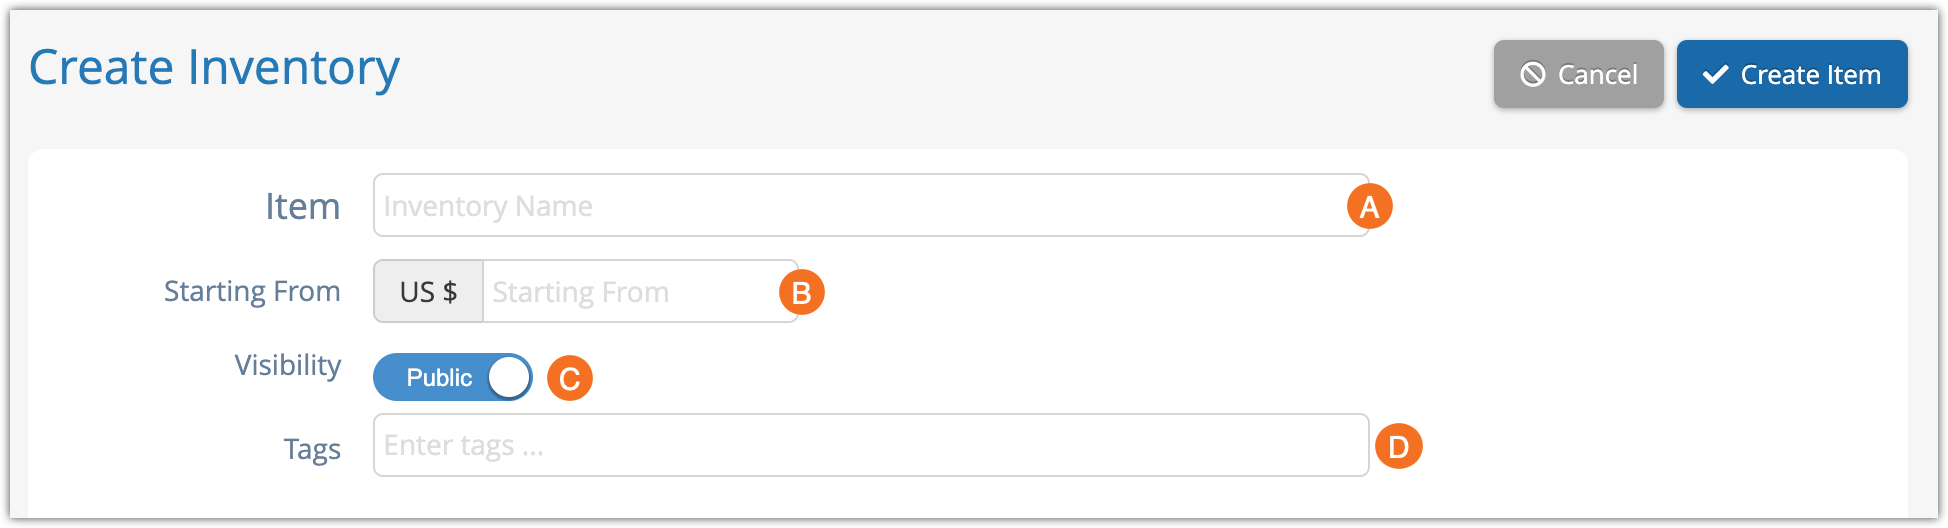
4. Enter a starting price (B). This will be the price shown on inventory lists on booking sites, but it’s not the final price you’ll charge. That’s set when you make your bookable options, and can be adjusted by things like promo codes or price sheets.
5. Set the item’s Visibility (C). This lets you toggle whether your item is available publicly on your booking site, or is only available with a direct link.
6. Enter any Tags you want to use (D). These can be used to search or filter your inventory, both in the Rezgo back end and on your booking website.

7. Next, toggle whether or not you want to collect reviews (A). Rezgo’s verified review system sends automated review requests after an event. You can turn that off if you don’t want it, but you can also disable it on individual items if you don’t want to ask customers for reviews for them.
8. The Provided By field (B) and Owner field (C) can be skipped, unless you need them:
- Provided By is the service provider that should be associated with the item. If you don’t work with third-party service providers, you can ignore this.
- Owner is the user who owns the item, which is used for reporting. If you don’t want to assign inventory to specific users, you can ignore this.
9. Now, it’s time to fill out the inventory’s details. None of these are mandatory, but if you plan to list your inventory anywhere, it’s helpful to add a location, details, and images, as well as an SEO title and meta description so people can find you:
- Location lets you set a map location for the item.
- Details are all the additional details you’d like to share with your customers. You’ll definitely want to include an overview, which is the main description of the activity you’re selling, and you can find an explanation of the rest in the linked article.
- Tickets allows you to include item-specific content on your tickets.
- Waiver allows you to include an configure a waiver for customers to sign.
- SEO Title is the name that will be provided to search engines.
- Meta Description is the description of your item that will be provided to search engines.
- Images are any pictures you’d like to use to show off your activity. These should be at least 1280 px by 720 px. Images are a huge factor in customer booking decisions, so use this space well.
- Cross-sell Inventory is any inventory you want to actively prompt users to book when they’re also booking this item. If you want to make it easy to book certain items together, though, packages may be what you need.
- Related Inventory is shown on the inventory listing, so people who aren’t interested in booking this item can see another, similar item that might appeal more.
6. Click Create Item once you’re done.

Before your activity can be booked, you need to create at least one option for your item. You can create multiple options if your activity has variations, like if it offers several starting times a day, or you can create a single option if your activity doesn’t vary.