How to create a price sheet
Price sheets can be used to override retail prices for users, desks, locations or security groups who make bookings through the Rezgo Point of Sale and, optionally, for front-end bookings.
To create a price sheet, go to Inventory > Price Sheets. If that menu item isn’t available, your user account may not have access, or you may need to enable it by customizing your menu layout.
1. Click Create Sheet.

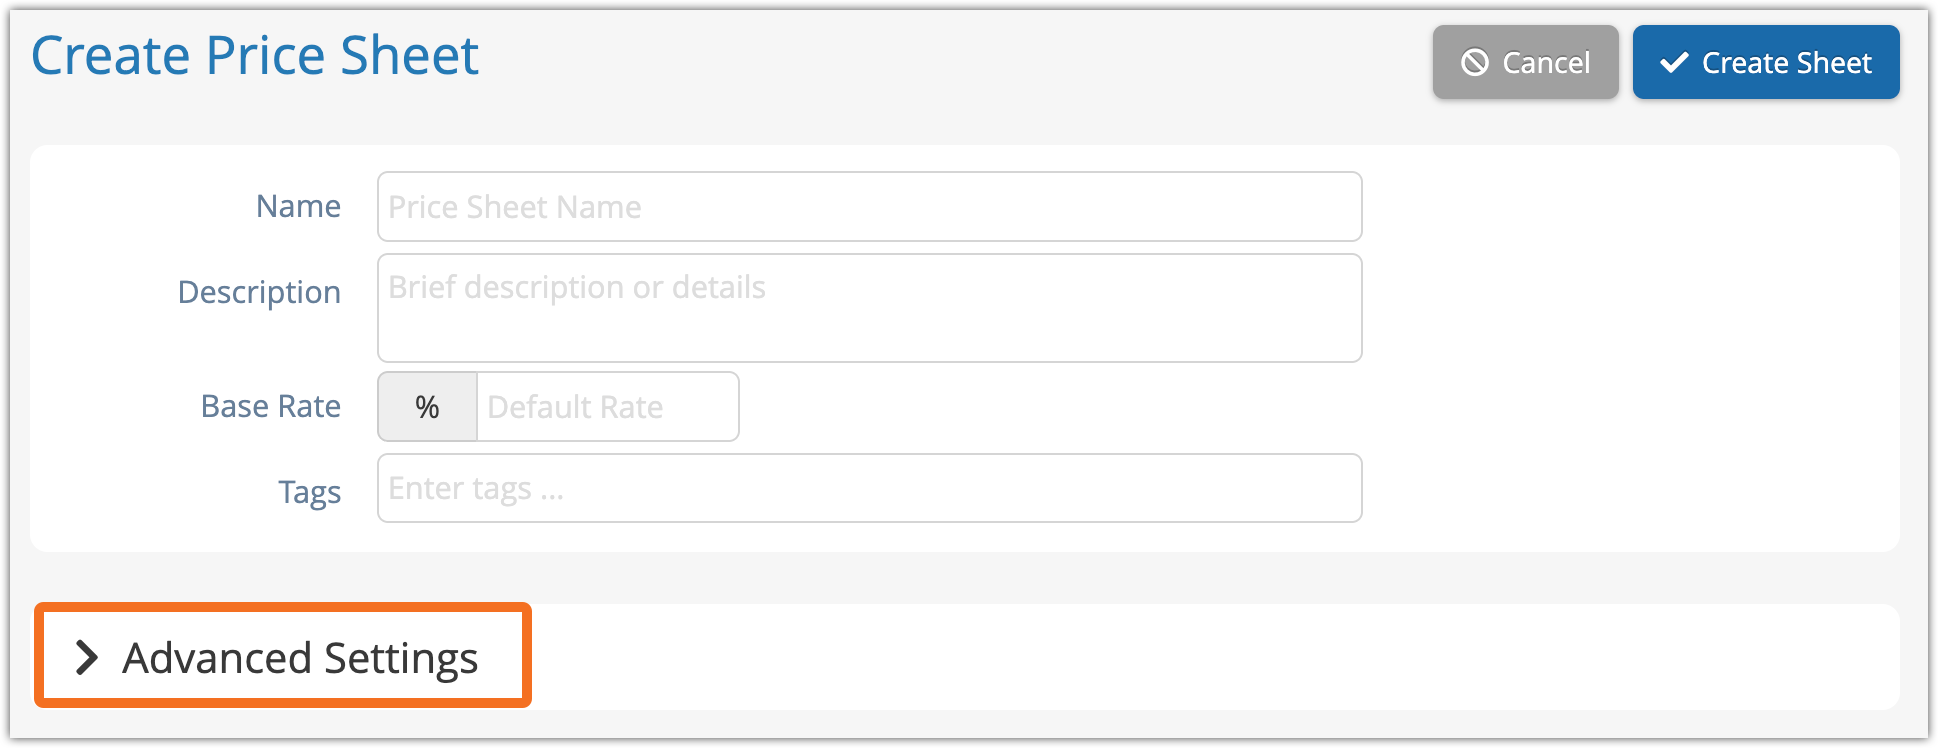
2. Give the price sheet a name (A) and description (B) for reference purposes.
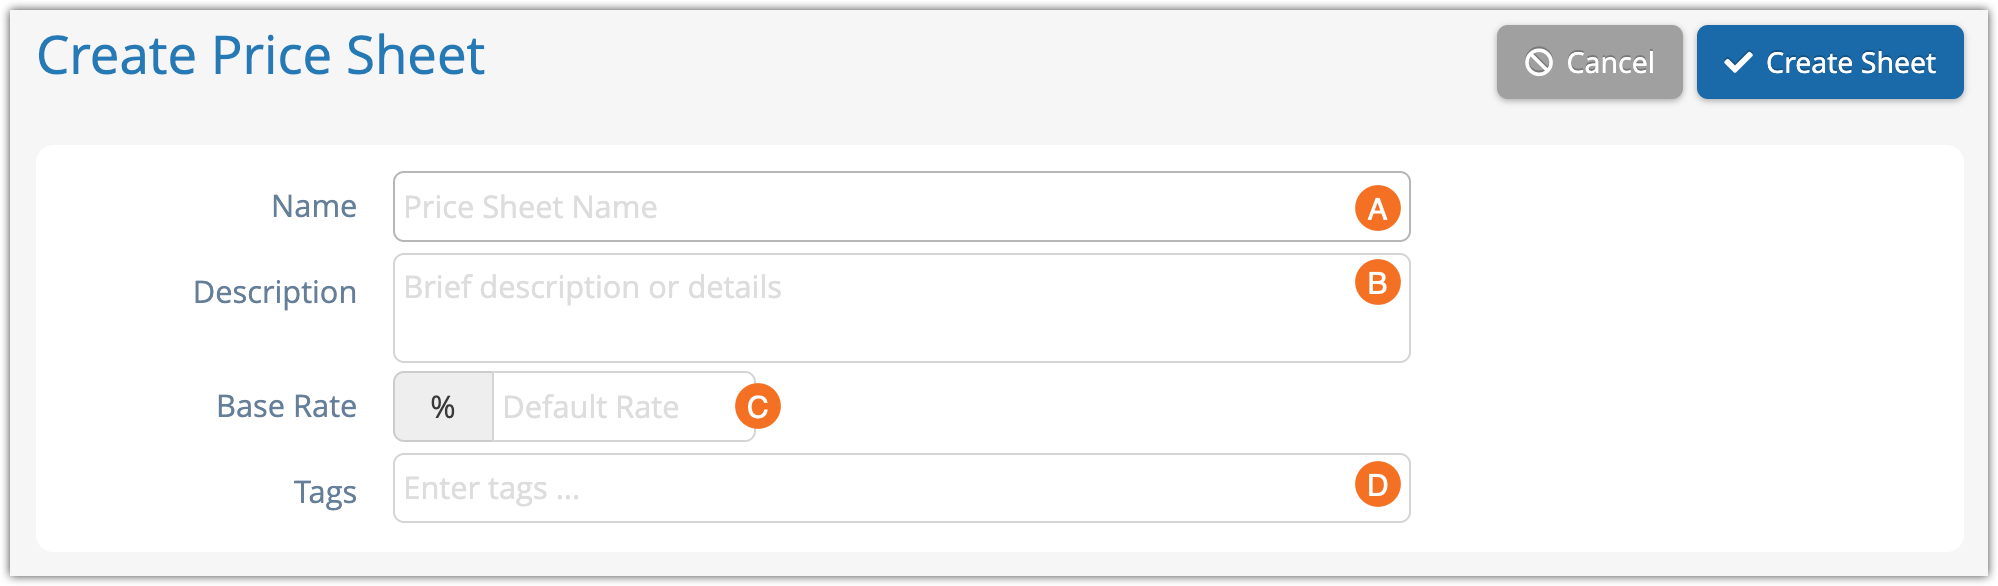
3. Set the base rate for the price sheet, if needed (C). By default, price sheets are configured for net-rate pricing.
4. Add any tags you want to use to help find this sheet in the future (D).
Assign price sheets to users
1. Click Add New Criteria.

2. Select the customers, users, desks, locations or security groups this price sheet should apply to. Only one price sheet can apply to a user at a time, so please ensure that you don’t create conflicting price sheets.
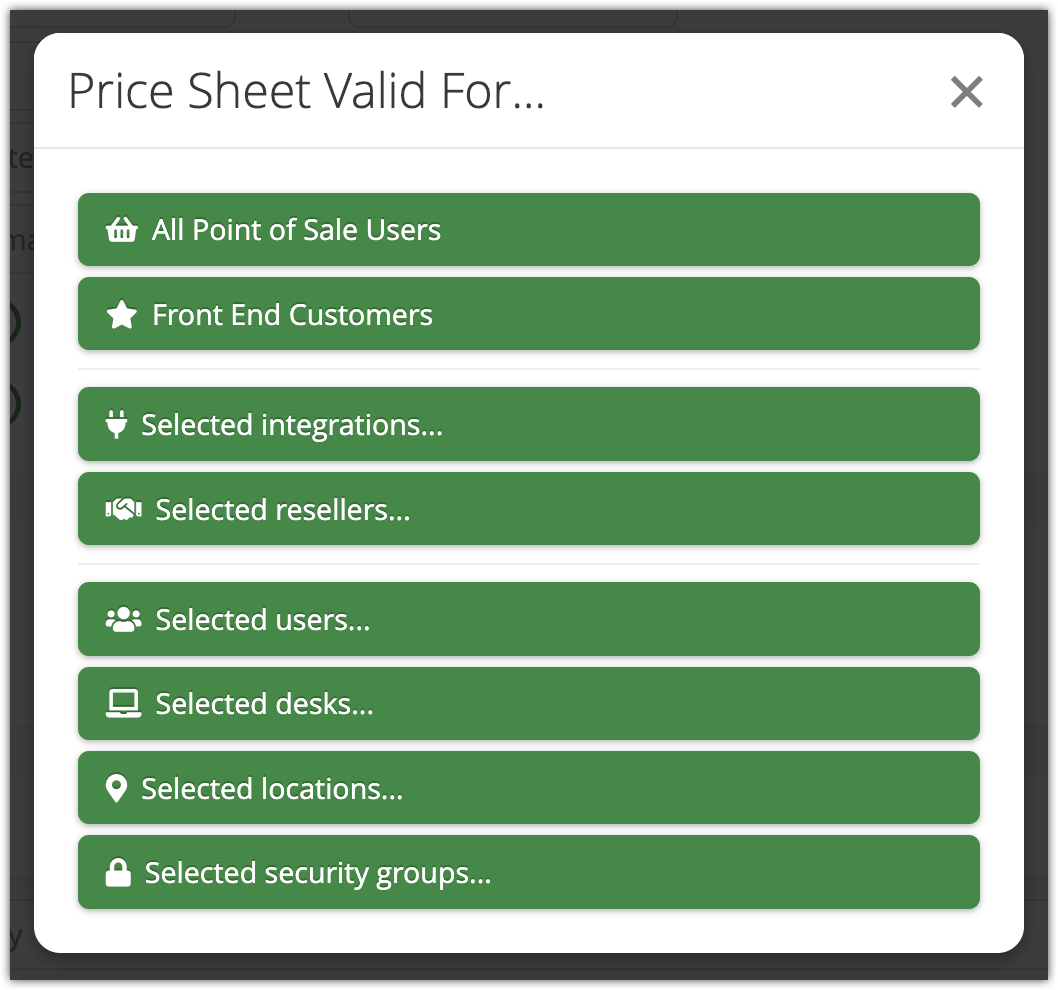
- If the price sheet should apply to all users who make bookings through the Point of Sale, click All Point of Sale Users.
- If the price sheet should apply to front-end bookings, click Front End Customers.
- If the price sheet should be more specific, select the criteria that apply. You can combine desks, locations, security groups, individual users, resellers and front-end customers in any combination. You can also allow access for specific API integrations.
3. If you picked specific criteria, click the criteria field to select the users, desks, locations, resellers or security groups that should be added.

4. Repeat steps 1-3 until all criteria have been selected.
5. Continue to the sections below to specify inventory.
Add inventory to your price sheet
If you don’t want your price sheet to apply to everything, you can select the inventory it applies to.
1. Click the Inventory dropdown and select Contains these specific inventory items (A).
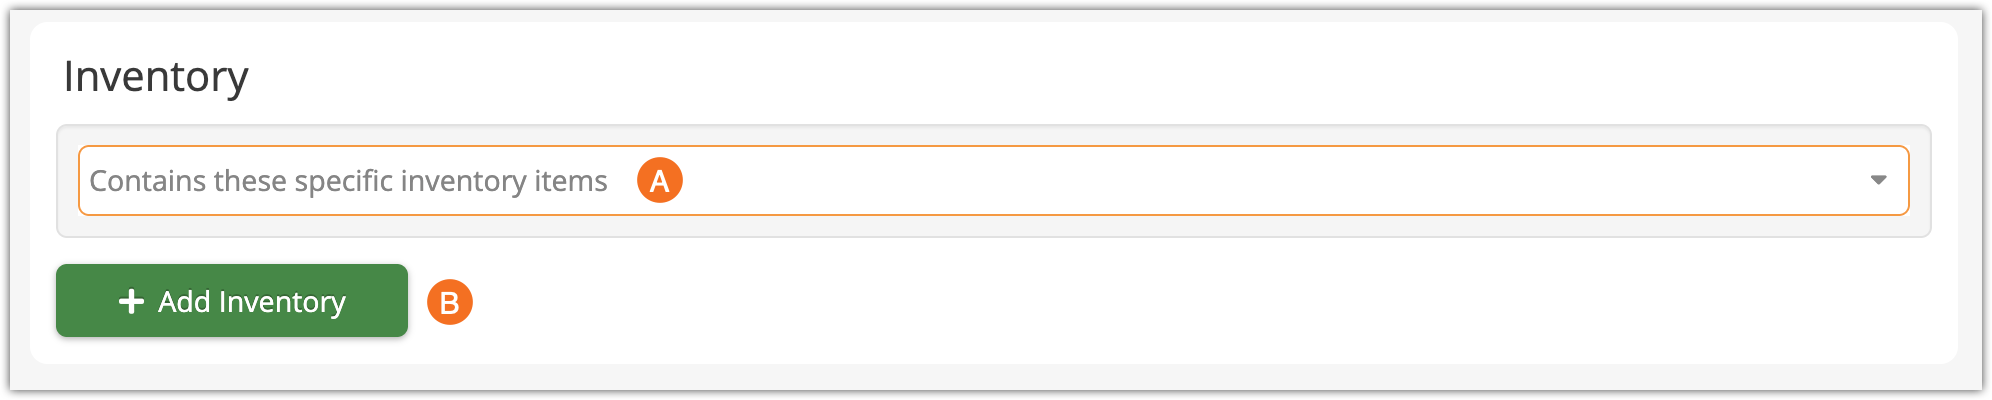
2. Click Add Inventory (B).
3. There are a few ways to find inventory for your price sheet.
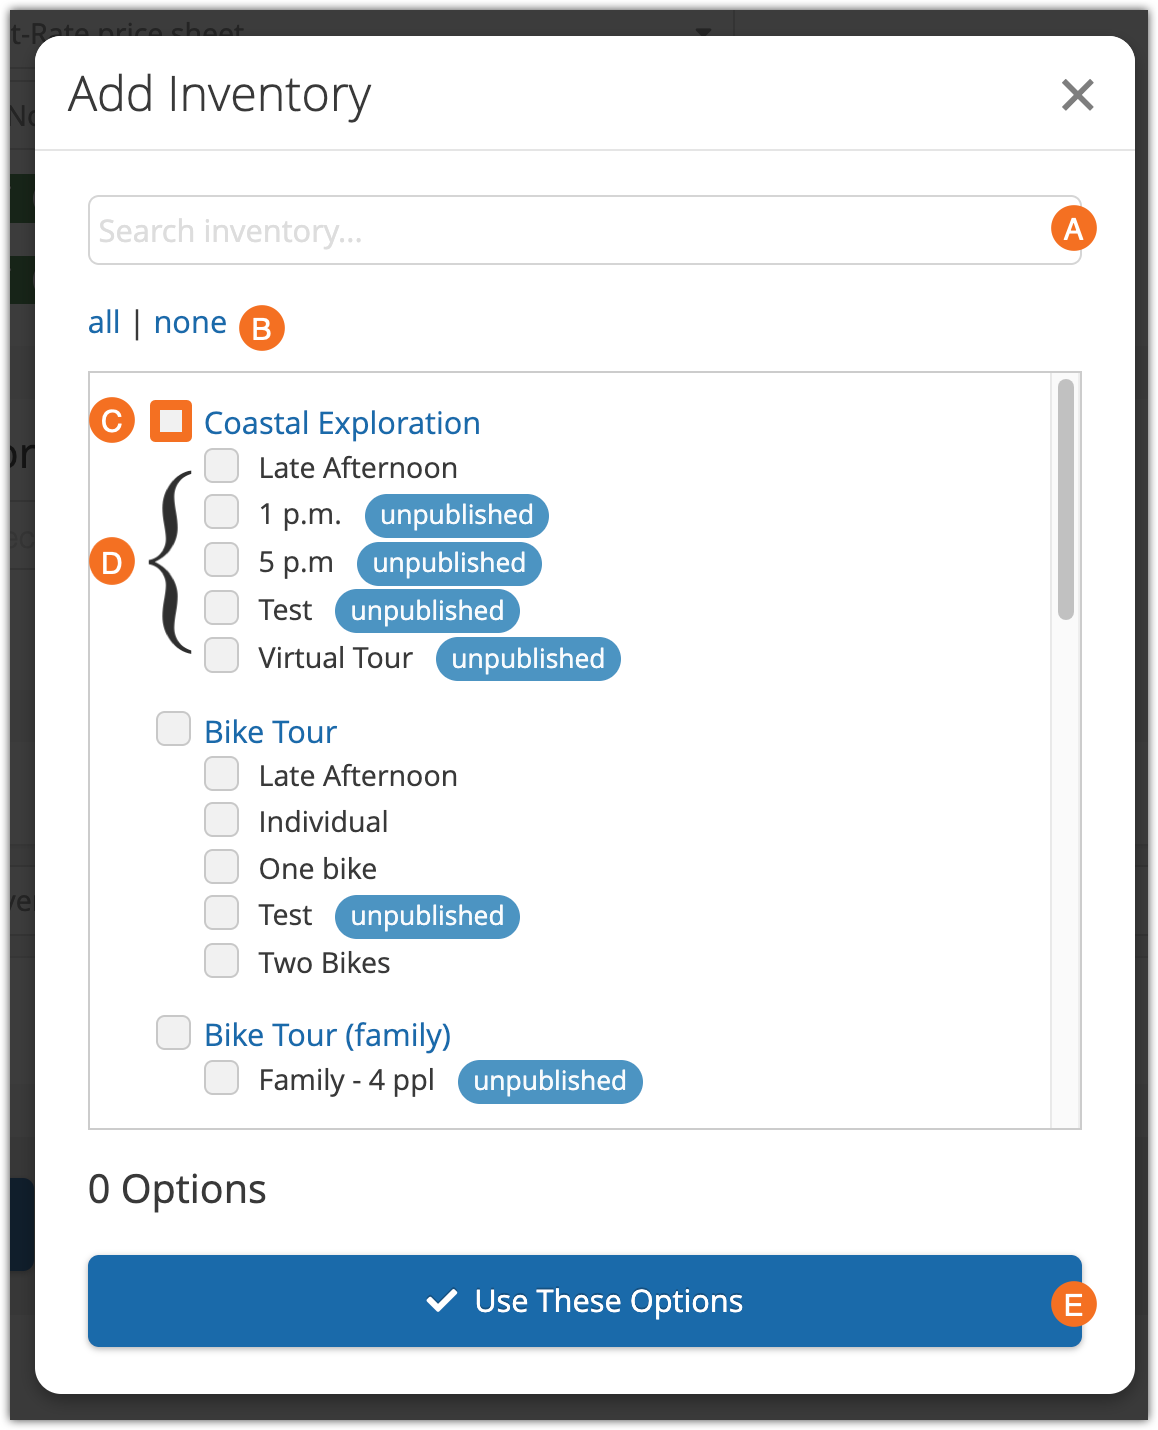
- You can search (A) for specific inventory names. This will filter the results by the search term.
- You can click all (B) to select everything and then manually uncheck the options you don’t want to include.
- You can click none (B) to reset your selections.
- You can click the checkbox next to inventory items (C) to include all their options.
- You can click the checkbox next to individual options as well (D).
3. Click Use These Options (E).
Override rates and prices
Once you select specific inventory and products for a price sheet, you can adjust the retail price and net rate or commission. You can also track contract and contract retail values.
1. To override the retail price of inventory for all users that are assigned this price sheet, enter a new price in the Price field (A).
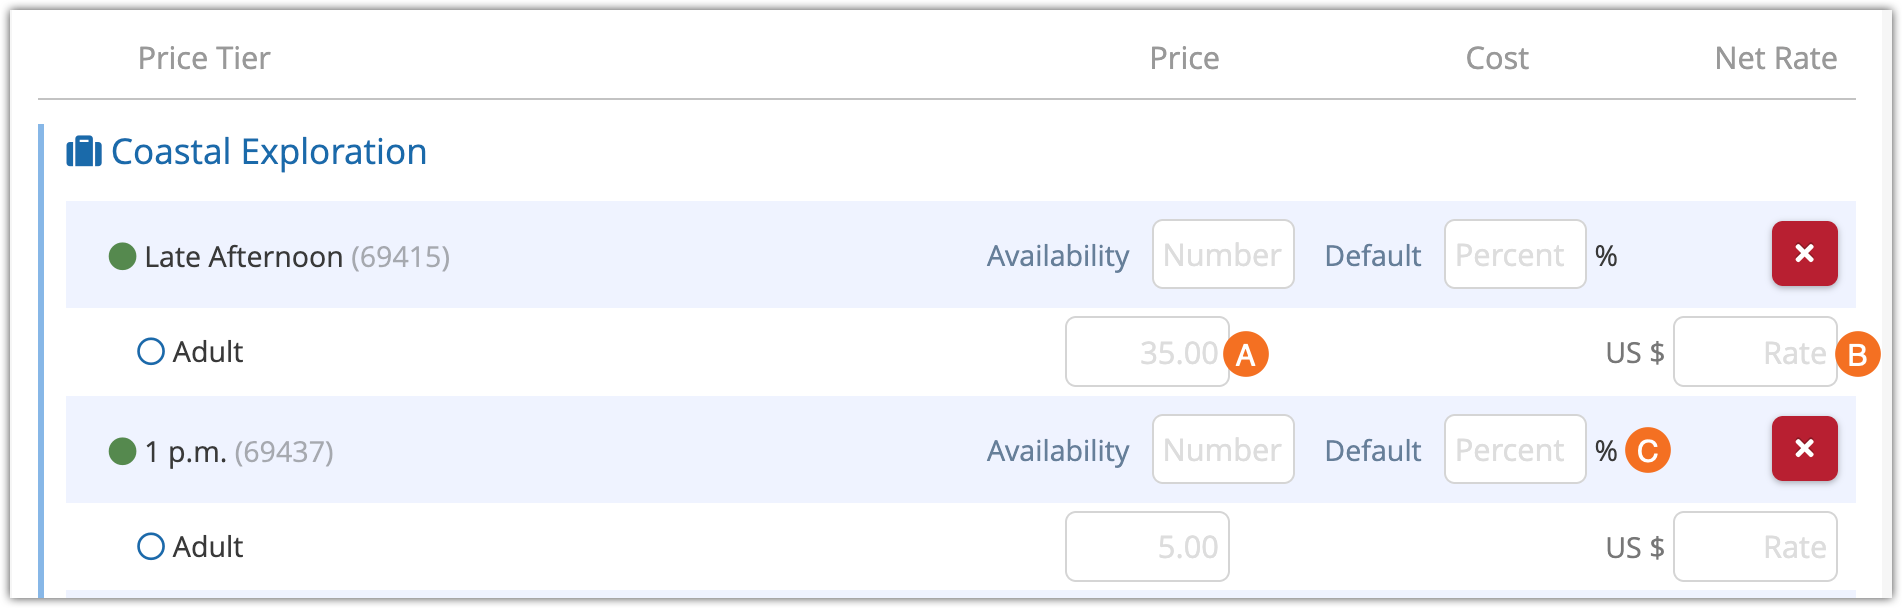
- To override the default rate for net rate or commission specified above, enter a new value in the Net Rate field (B) or a percentage in the Net Rate percent field (C).
- For commission price sheets, enter a percentage in the Commission field of the item or option.
Override availability
Normally, inventory gets its availability from its options or the rules that apply to them. You can also use price sheets to restrict users to a limited portion of that availability.
Enter the amount of spaces available to the price sheet in the Availability field.
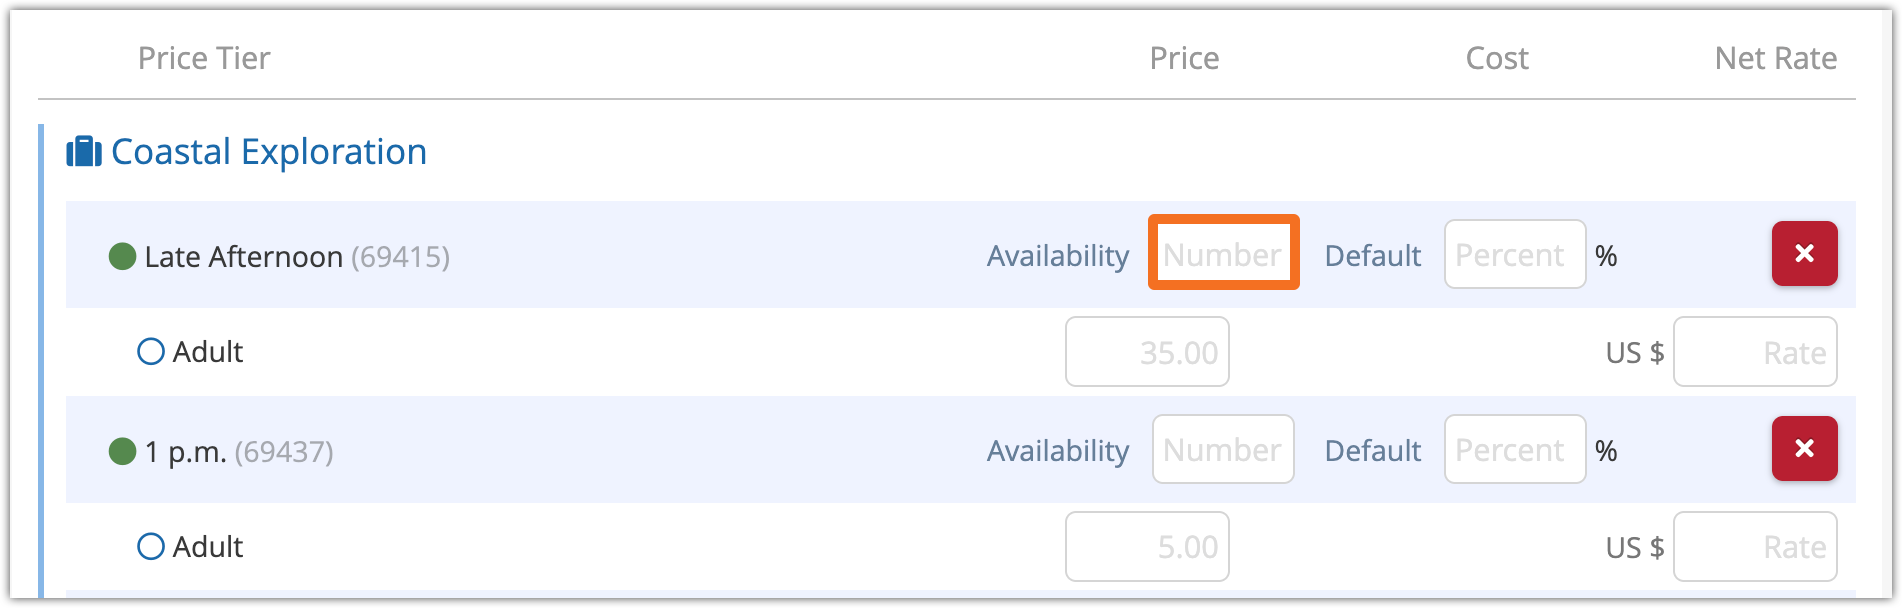
Everyone who uses this price sheet will only be have access to that much availability for booking. Bookings that don’t use this price sheet do not subtract from this availability pool until the total availability falls below the amount in the pool.
Finalize the price sheet
When you finish preparing your price sheet, click Create Price Sheet.
The price sheet will immediately be in use for all users, locations, resellers, integrations or customers you assigned to it. If you’d like to use it at a later date instead, you can deactivate it until you’re ready.
Advanced settings
If you want to set dates, cutoffs, or other adjustments to your sheets, click the Advanced Settings heading.
Here, you can set a start (A) and/or end date (B) for your price sheet. These dates apply to the booked-for date (the date of the event that the customer is booking). The price sheet will only apply to bookings for dates within this range if you set one. This is a great option for seasonal pricing.
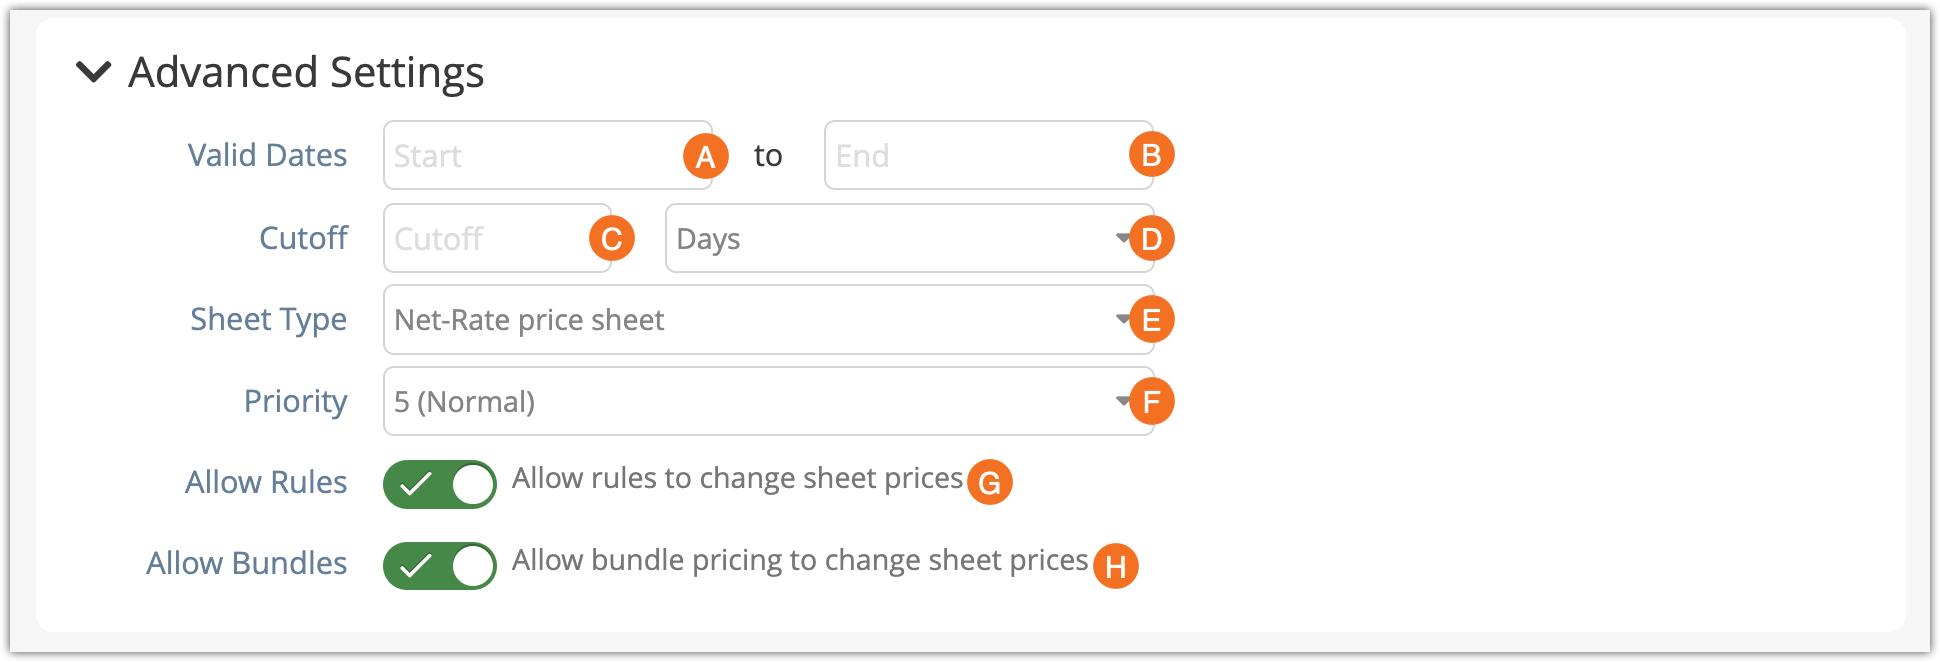
- You can set a cutoff for the pricing (C) in days or hours (D).
- You can choose a net-rate price sheet to adjust pricing for customers, or a commission-based price sheet to set commissions for your users (E).
- You can set the priority of your price sheet (F). This is relevant if you have multiple price sheets that apply to the same inventory for the same users on the same dates. In those cases, the price sheet with the highest priority will apply.
- You can select whether rules should be able to override the prices on the sheet or not (G). This is enabled by default.
- You can select whether bundles should be able to change sheet prices (H). This is also enabled by default. If you want to prevent bundles from being used on the point of sale at all, you can disable them in your settings.