How to create a tour or review widget for your website
With the Rezgo Widget Builder, you can create a button or link for your website that will bring up your tours and activities so your customers can browse them without leaving your website. It can also be used to create a button that will bring up reviews for one or all of your items.
You can include multiple booking/review widgets on a single page.
First, go to Settings in the main menu. Click Website & Widget.
1. Click Create New Widget.

2. Enter a name for your widget so you can identify it (A).

3. Leave the widget active (B) if you plan to use it soon, or toggle it to inactive if you don’t want it to be usable. (Don’t worry – no one can use it until the widget code you generate is pasted into a website.)
Set Up Your ‘Book Now’ Button
4. Set up your button by giving it a button text label (A). This is the “Call to Action” or CTA, so the text should say something that will motivate your customers, like “Book Now.” You can see a preview of the button under “Button Preview.”
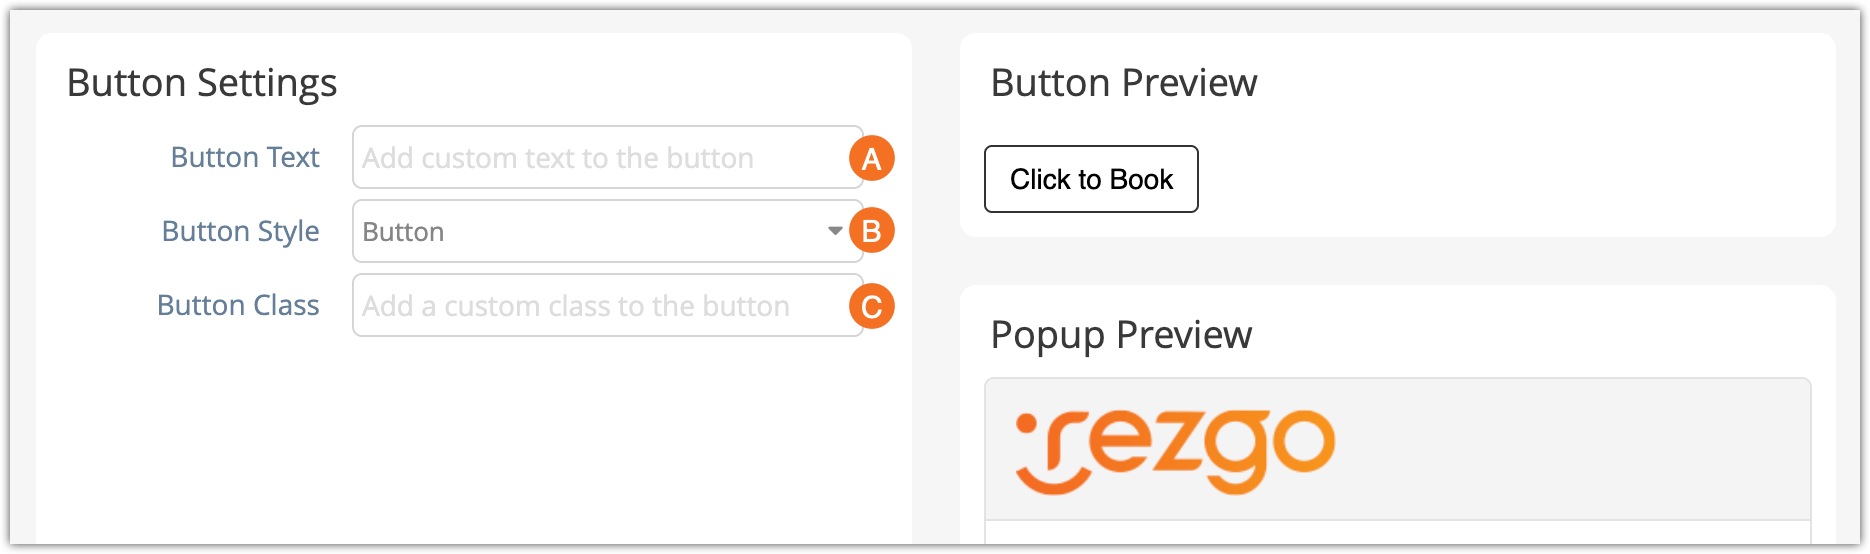
5. Pick your button style (B). Your widget can be opened with a button or a text link.
6. Enter a class (C), if needed. This class lets you style it in your website’s style sheets, so note this down for your website designer.
Set Up Your Widget Popup
Now that you’ve set up your button, you can set up your widget as well.
7. Pick your display mode (A). This is what your widget will include.
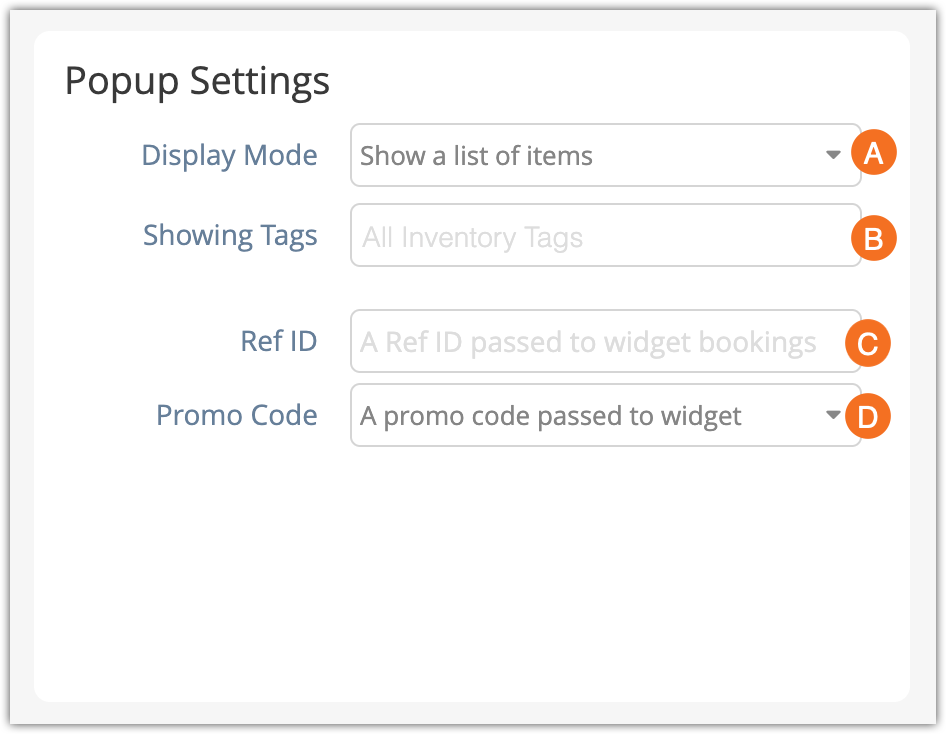
Often, this will be a list of items (a customer-friendly list of your tours and activities), but it can also be a single inventory item, a list of all your Rezgo reviews, or a Rezgo reviews for a single item.
8. Filter your widget, if needed (B).
- For a list of items, you can choose to show specific inventory tags instead of your full inventory list. Pick the tags from the Showing Tags dropdown.
- For single items or single reviews, you need to pick the item to show from the Showing Item dropdown.
- 9. Add a Ref ID (C) if needed. Any text you enter here will show up in your booking reports so you can see the source of the bookings.
- 10. You can pick a promo code (D), but this is optional. It will automatically be used on bookings made through your widget.
- 11. Create Widget.
Embed Your Rezgo Widget on Your Website
To put your widget on your website, you need to copy a bit of code. If you don’t have access to your website’s code, you can send the widget code to your website designer, instead. It’s a good idea to have someone who knows HTML set this up, whether that’s you or someone else.
Please note: If you’re using website builder software, those generally have the ability to add custom code. Your software’s documentation or support team should be able to explain how.
Putting the button on your website
To put the button on your website directly, copy the text in the “Quick Embed” box. It should look something like this:

Paste that text wherever you want your button to appear, but make sure that’s not inside another HTML tag.
Linking an existing button
If you’d rather link an existing button to your widget, you can do that too. First, you need to copy the text in the top box (A) onto a blank line in your website’s code.
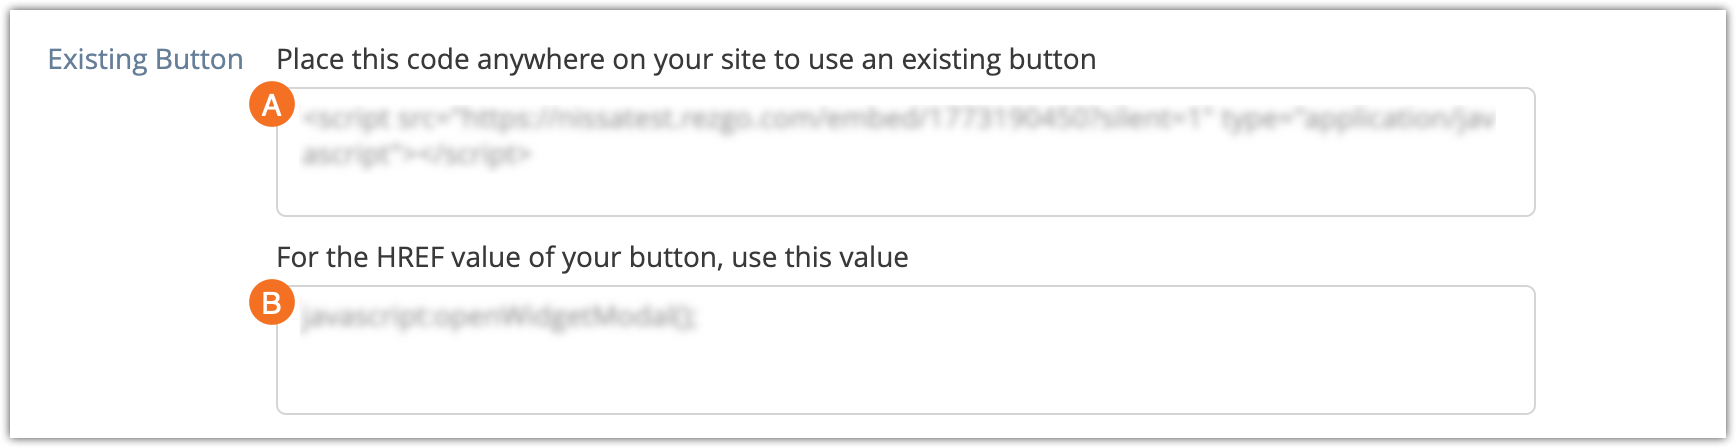
Then, you need to find the button you want to link your widget from. Replace the button’s link with the text in the second box (B). Usually, that will be the link in the button’s <a href=””> HTML tag.
Once you’ve embedded your widget on your website, your customers will be able to book right from your website!