

How to create options that use resource availability
When your event’s availability depends on seats in a vehicle, staffing numbers, rental availability, or other resources, you can create an option with resource-based availability.
Like events with Daily Availability, these options are still available on dates you set, and can have their availability adjusted manually as needed. But their availability will also adapt dynamically to the state of your resources: how many more people your tour guide can lead, how many more seats your bus has available, and so on. If you want to roster guides automatically, this is how you would do it.
To create a resource-based option, start by creating an option.
Setting up resource availability
1. When you need to choose an availability type, select Resource Availability.

2. Toggle whether or not you want the option’s current availability to be shown to your customers (A).
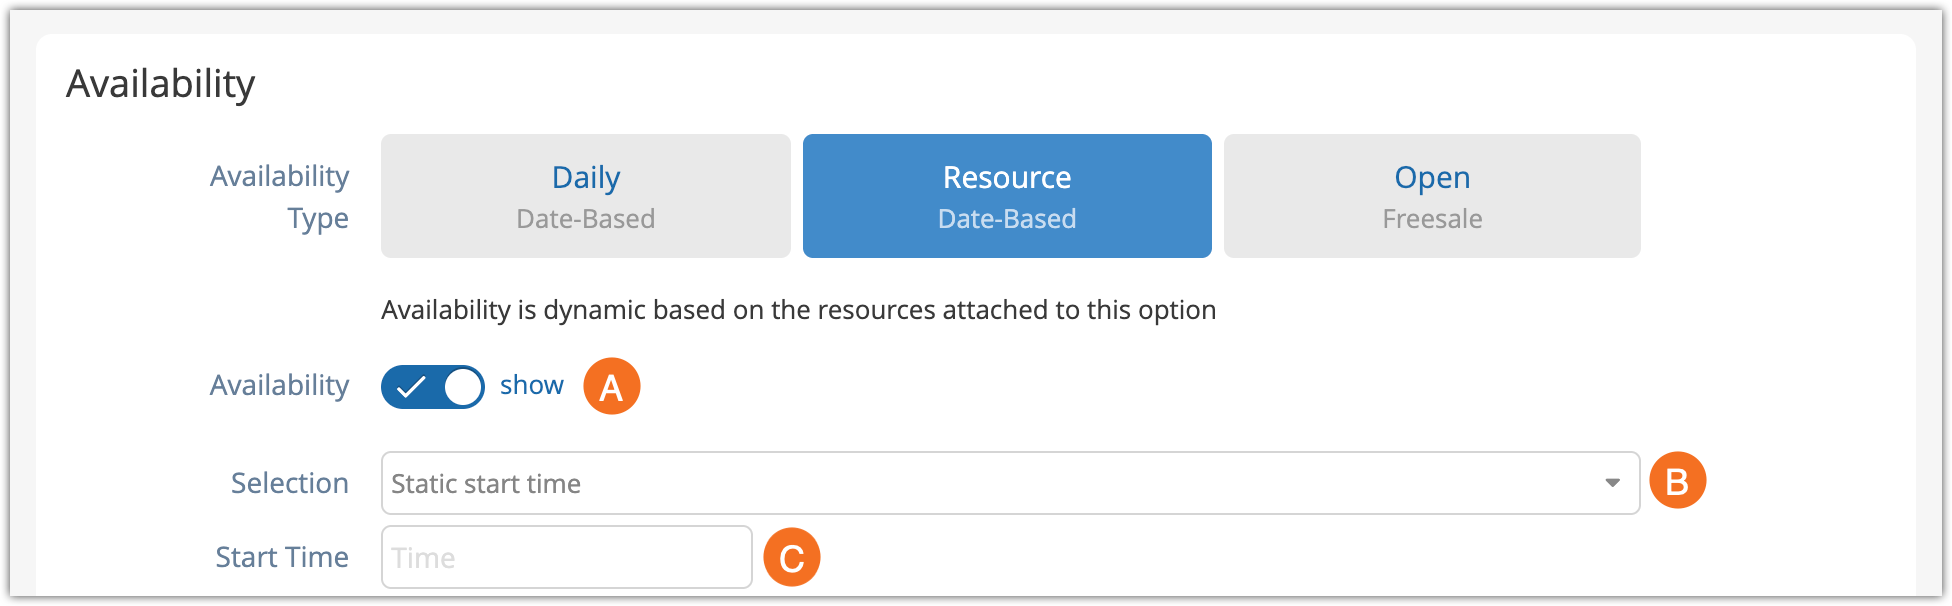
3. Decide whether your option should have a static start time or if it should use customer selectable start times (b).
For example, you might want your customer to show up at the set time of their tour, so you would choose “a static start time.” Otherwise, you might want them to choose their own timing for a rental or a private event, so you would choose “user can select a start time.“
If you choose Static start time, enter your event’s start time.

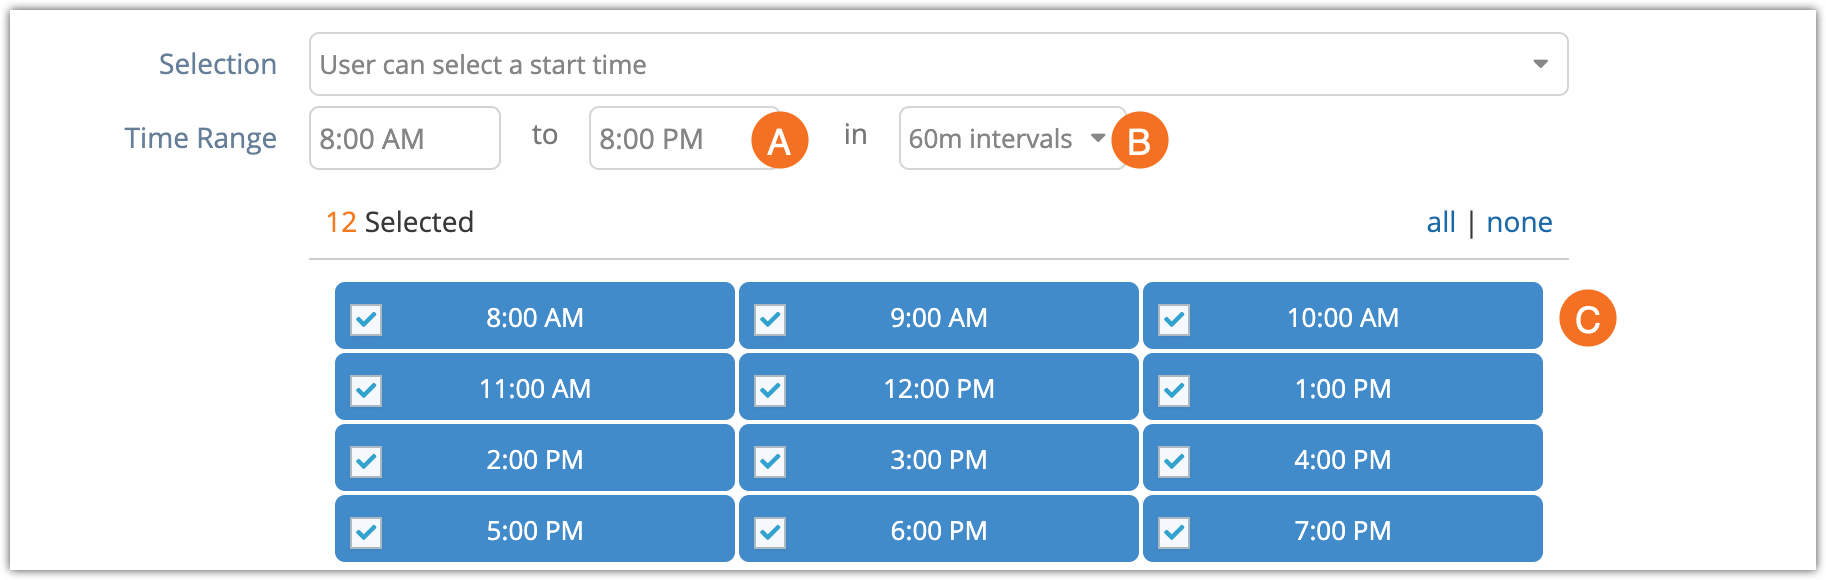
If you choose “User can select a start time,” enter the time range where you can offer the event or rental (A), and select the intervals you want to offer–from every five minutes up to every hour (B). You can then select or unselect individual start times to include (C).
4. Add the check-in time of the event (A), if needed, and choose if it’s in hours or minutes. If you want to make sure customers can’t be checked in before this time, you can also enable that in your system settings.
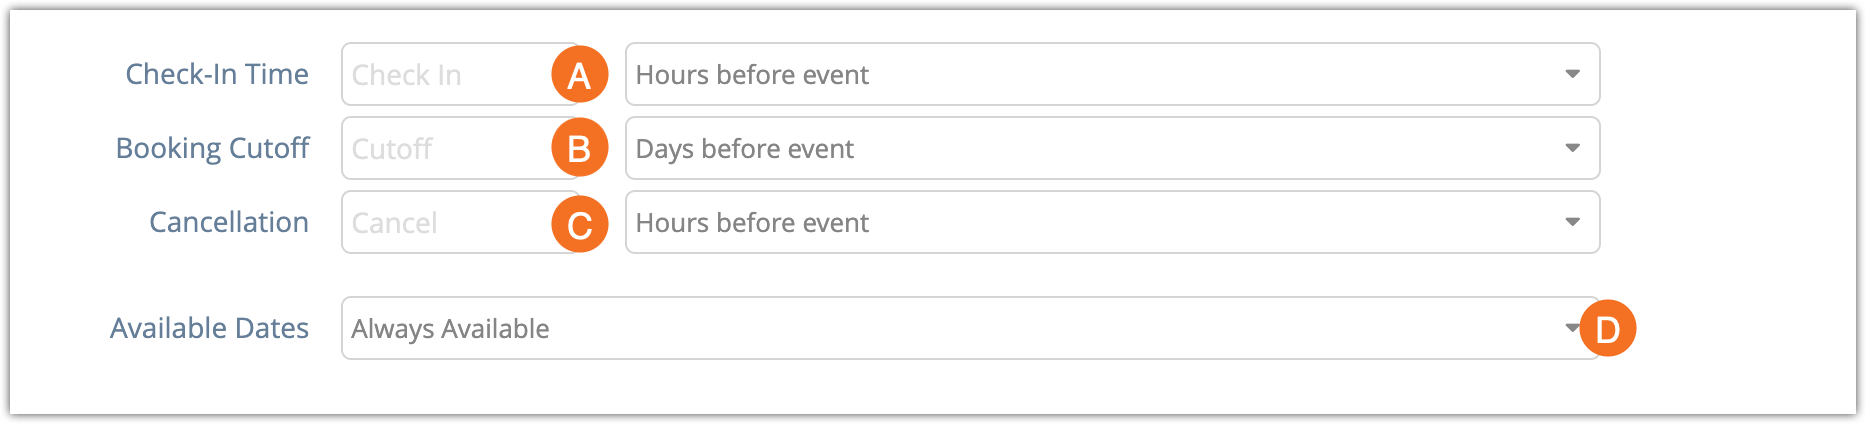
5. Add a booking cutoff, if needed (B). This is the number of days, hours, or minutes before the event where customers can no longer make bookings. If the option has a start time or the customer has selected a start time, this will be the number of hours or days before that time. Otherwise, it will be before 00:01 the day of the event.
6. Add a cancellation cutoff (C), if needed. This is the number of days or hours before the event when it can no longer be cancelled. This will not outright prevent cancellations, but it may be useful information for your users and resellers.
7. Select your available dates (D). Your option can be available every day, on one single date, for a date range, on certain days of the week, or on selected dates. After you create the option, you can also change the available days with rules or adjustments.
Attaching Resources to Options
Next, you need to attach resources to the option. You might need to create the resource first.
The availability of your option will depend on the dates and times you set, and it will also depend on the availability of your attached resource(s). If one event books up a resource, it won’t be available to other events at the same time (depending on your configuration). This lets you be more flexible with your options without risking overbookings.
1. Click Attach Resource.

2. Search for the resource you want to attach (A), then select the resource group (B) or resource (C) that you want to attach.
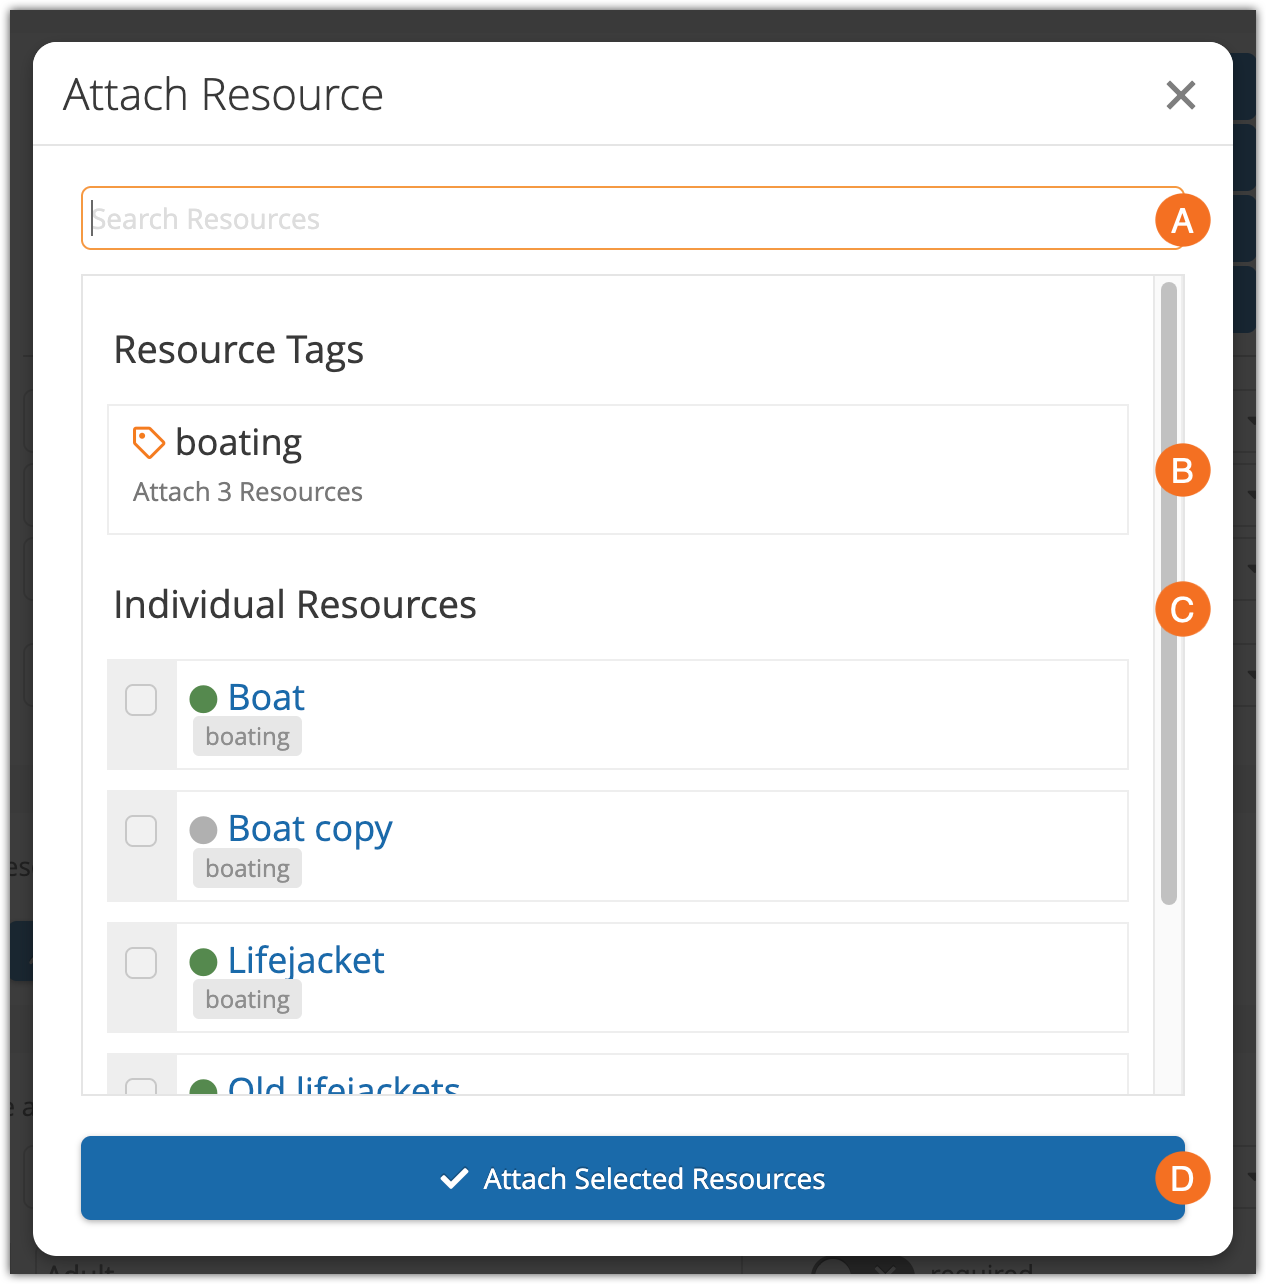
3. Click Attach Selected Resources (D). You’ll be able to see the total number of spaces that are available with the resources you’ve selected.
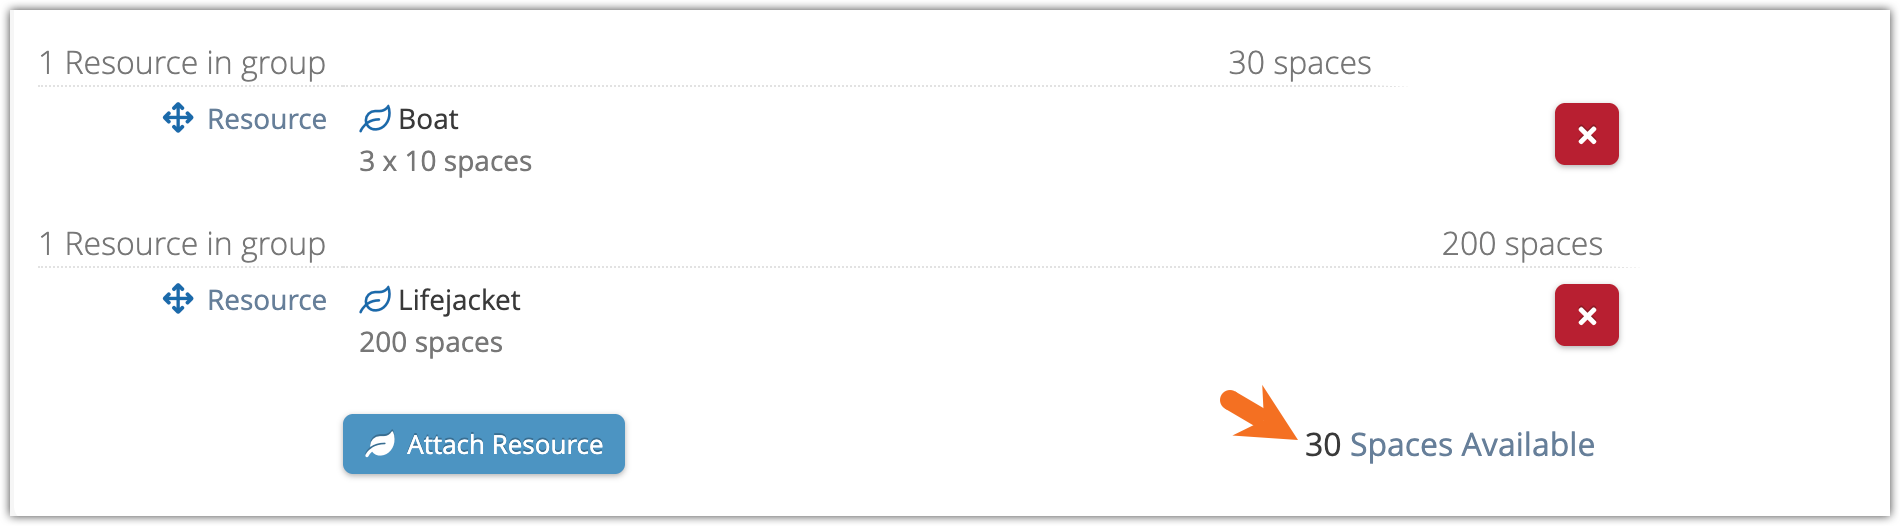
See the section below for more information on how to correctly group your resources if that number of spaces isn’t what you expected.
4. Finally, continue setting up your inventory option.
Grouping attached resources
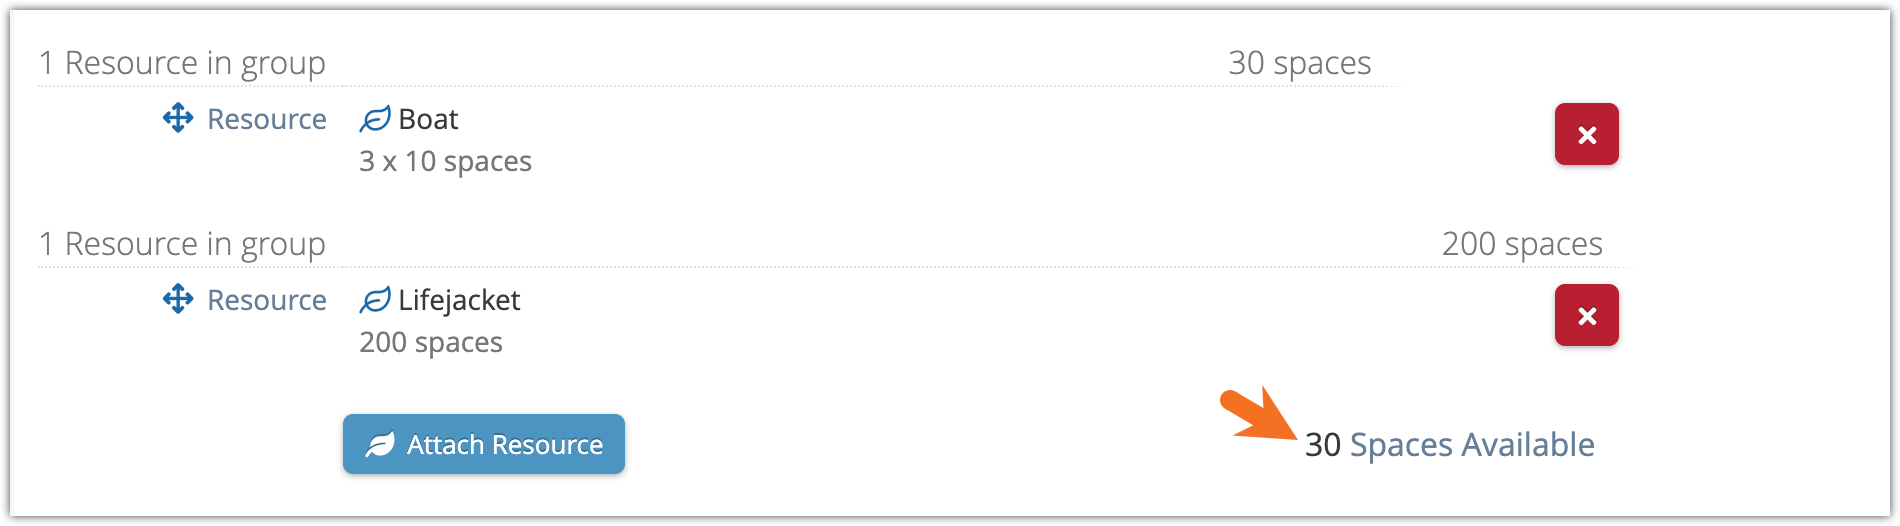
If you’ve selected multiple resources, make sure they’re grouped correctly. You can drag your resources into a single group if you want their availability to be added together. For example, if you have some new life jackets and some old life jackets and every booking can use either one, you should drag both into one group so their availability is combined.
Here, we have 300 resources in 2 groups, so their total availability is limited by the smaller group:
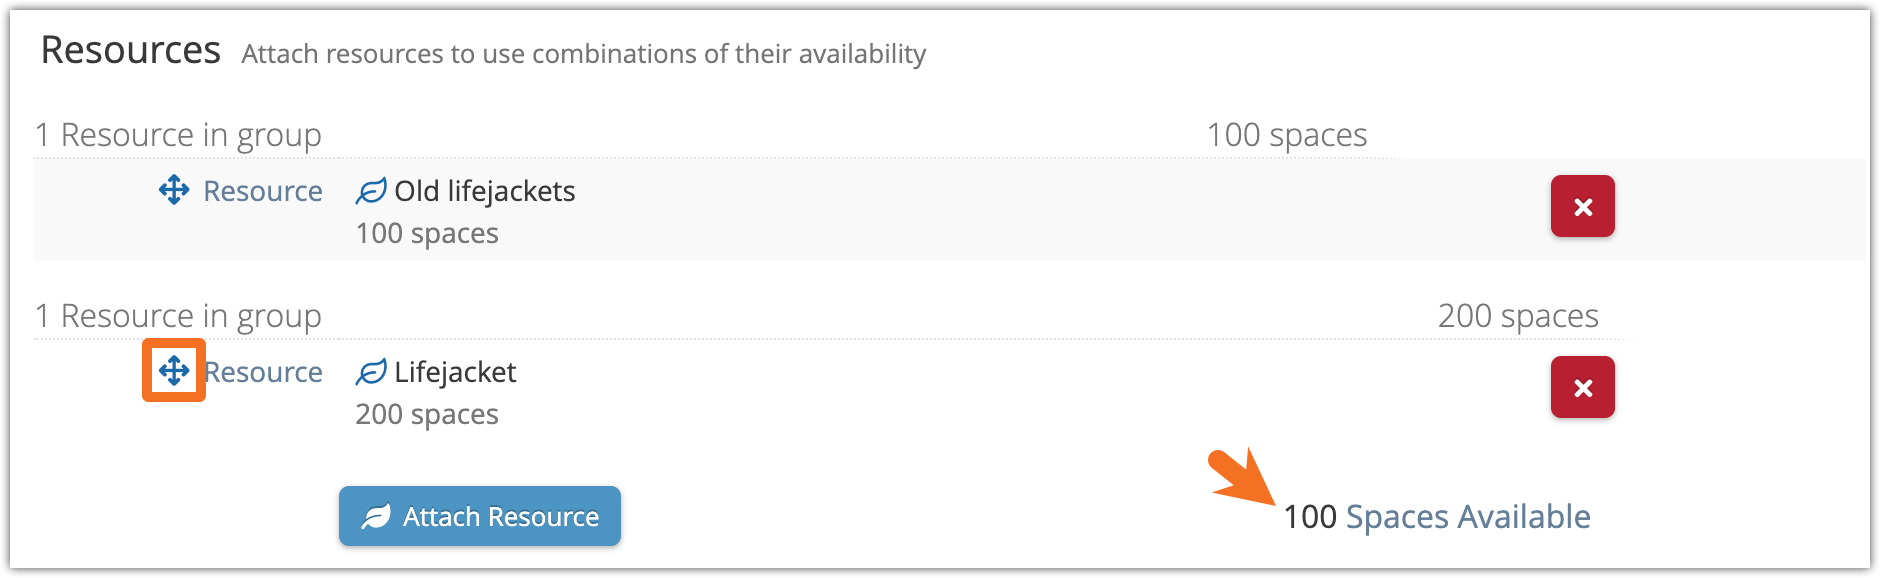
After moving them into one group, the availability is correct:
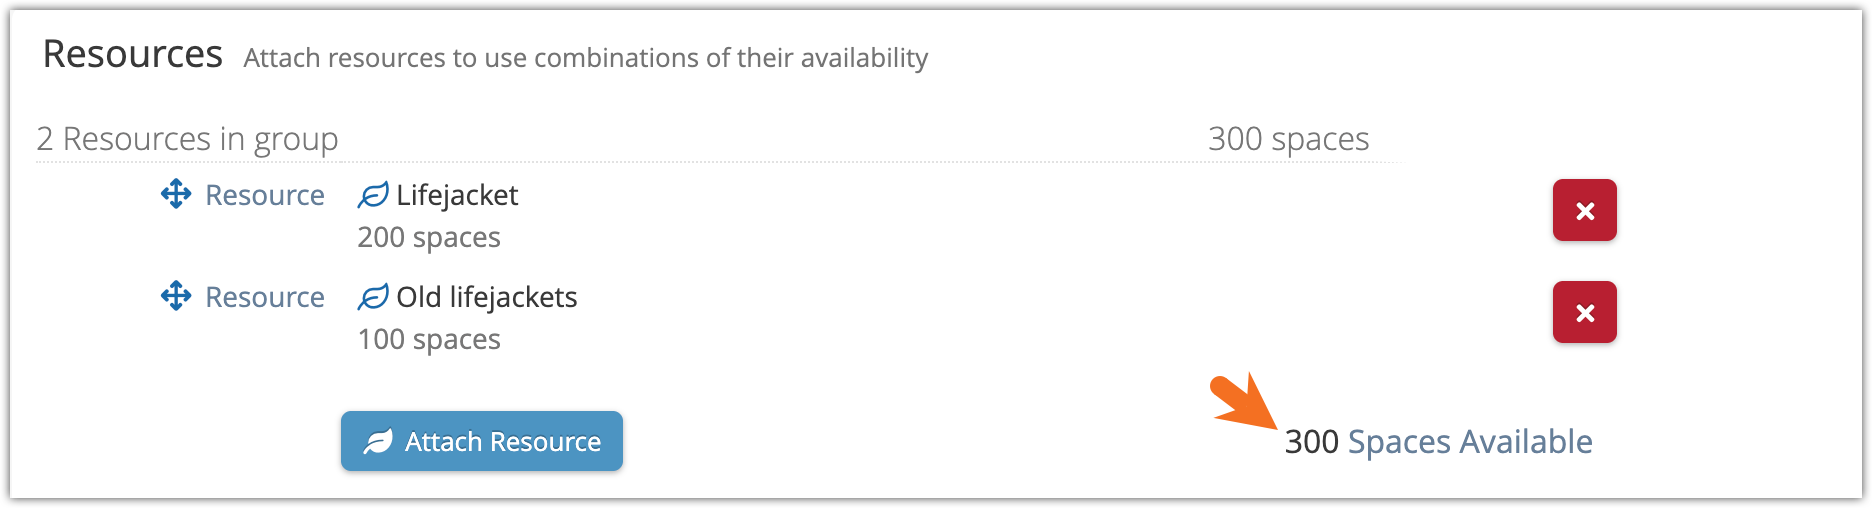
If, on the other hand, you had 200 lifejackets but 30 spaces on your fleet of boats, you’d want to be sure that they’re in separate groups, so the total available spaces will be the smaller number. You wouldn’t want 230 bookings for a boat that can hold 30 people.
You can drag one resource out of the group to create a new group with that resource.
Here’s a group with too many resources in it:

After dragging one out into its own group, the correct number of spaces will be available: